
…well I say popular, but that may be over-egging it. To be more precise, since my post where to begin with so many firsts which featured my new homemade painting board come paper carrier, I’ve had a few people express their interest in this item. Most recently I’ve been contacted by Helen to see whether I can provide some details about how this was made, in the hope that her husband can rustle something similar up for her own painting expeditions. It is this most recent request that has prompted this post. So on reflection, this post could be more accurately titled, ‘Because Helen asked me’?)
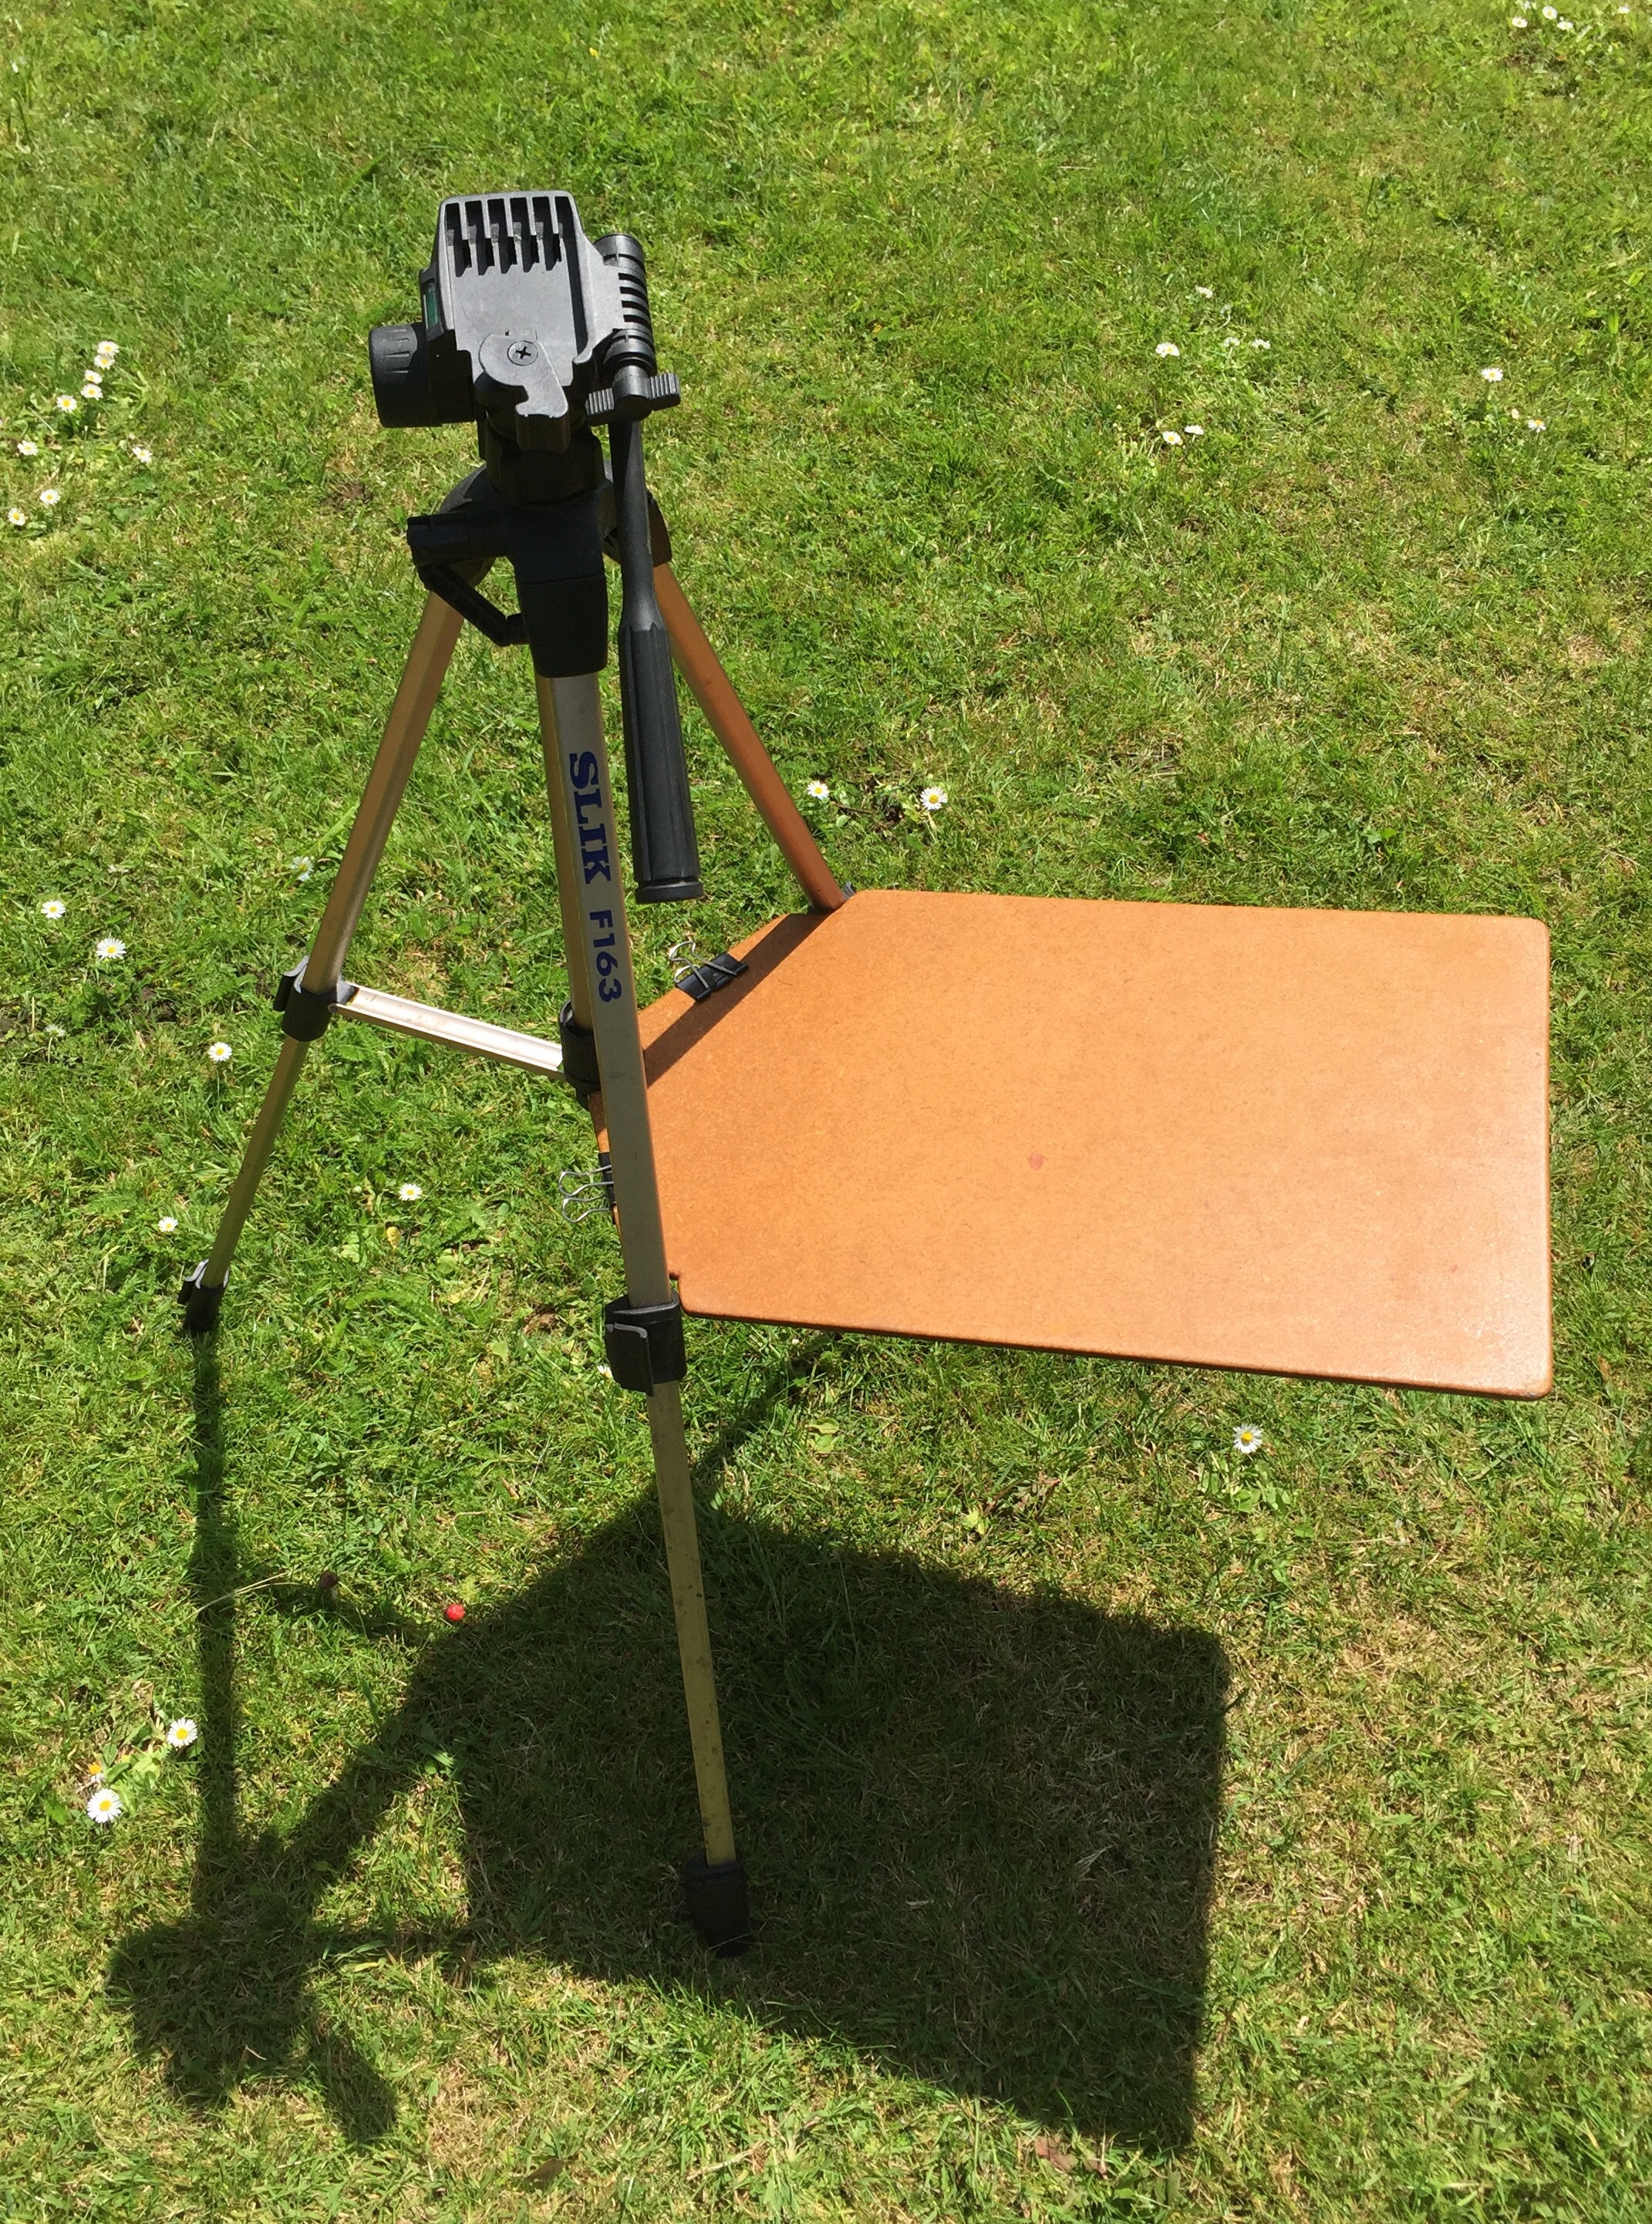
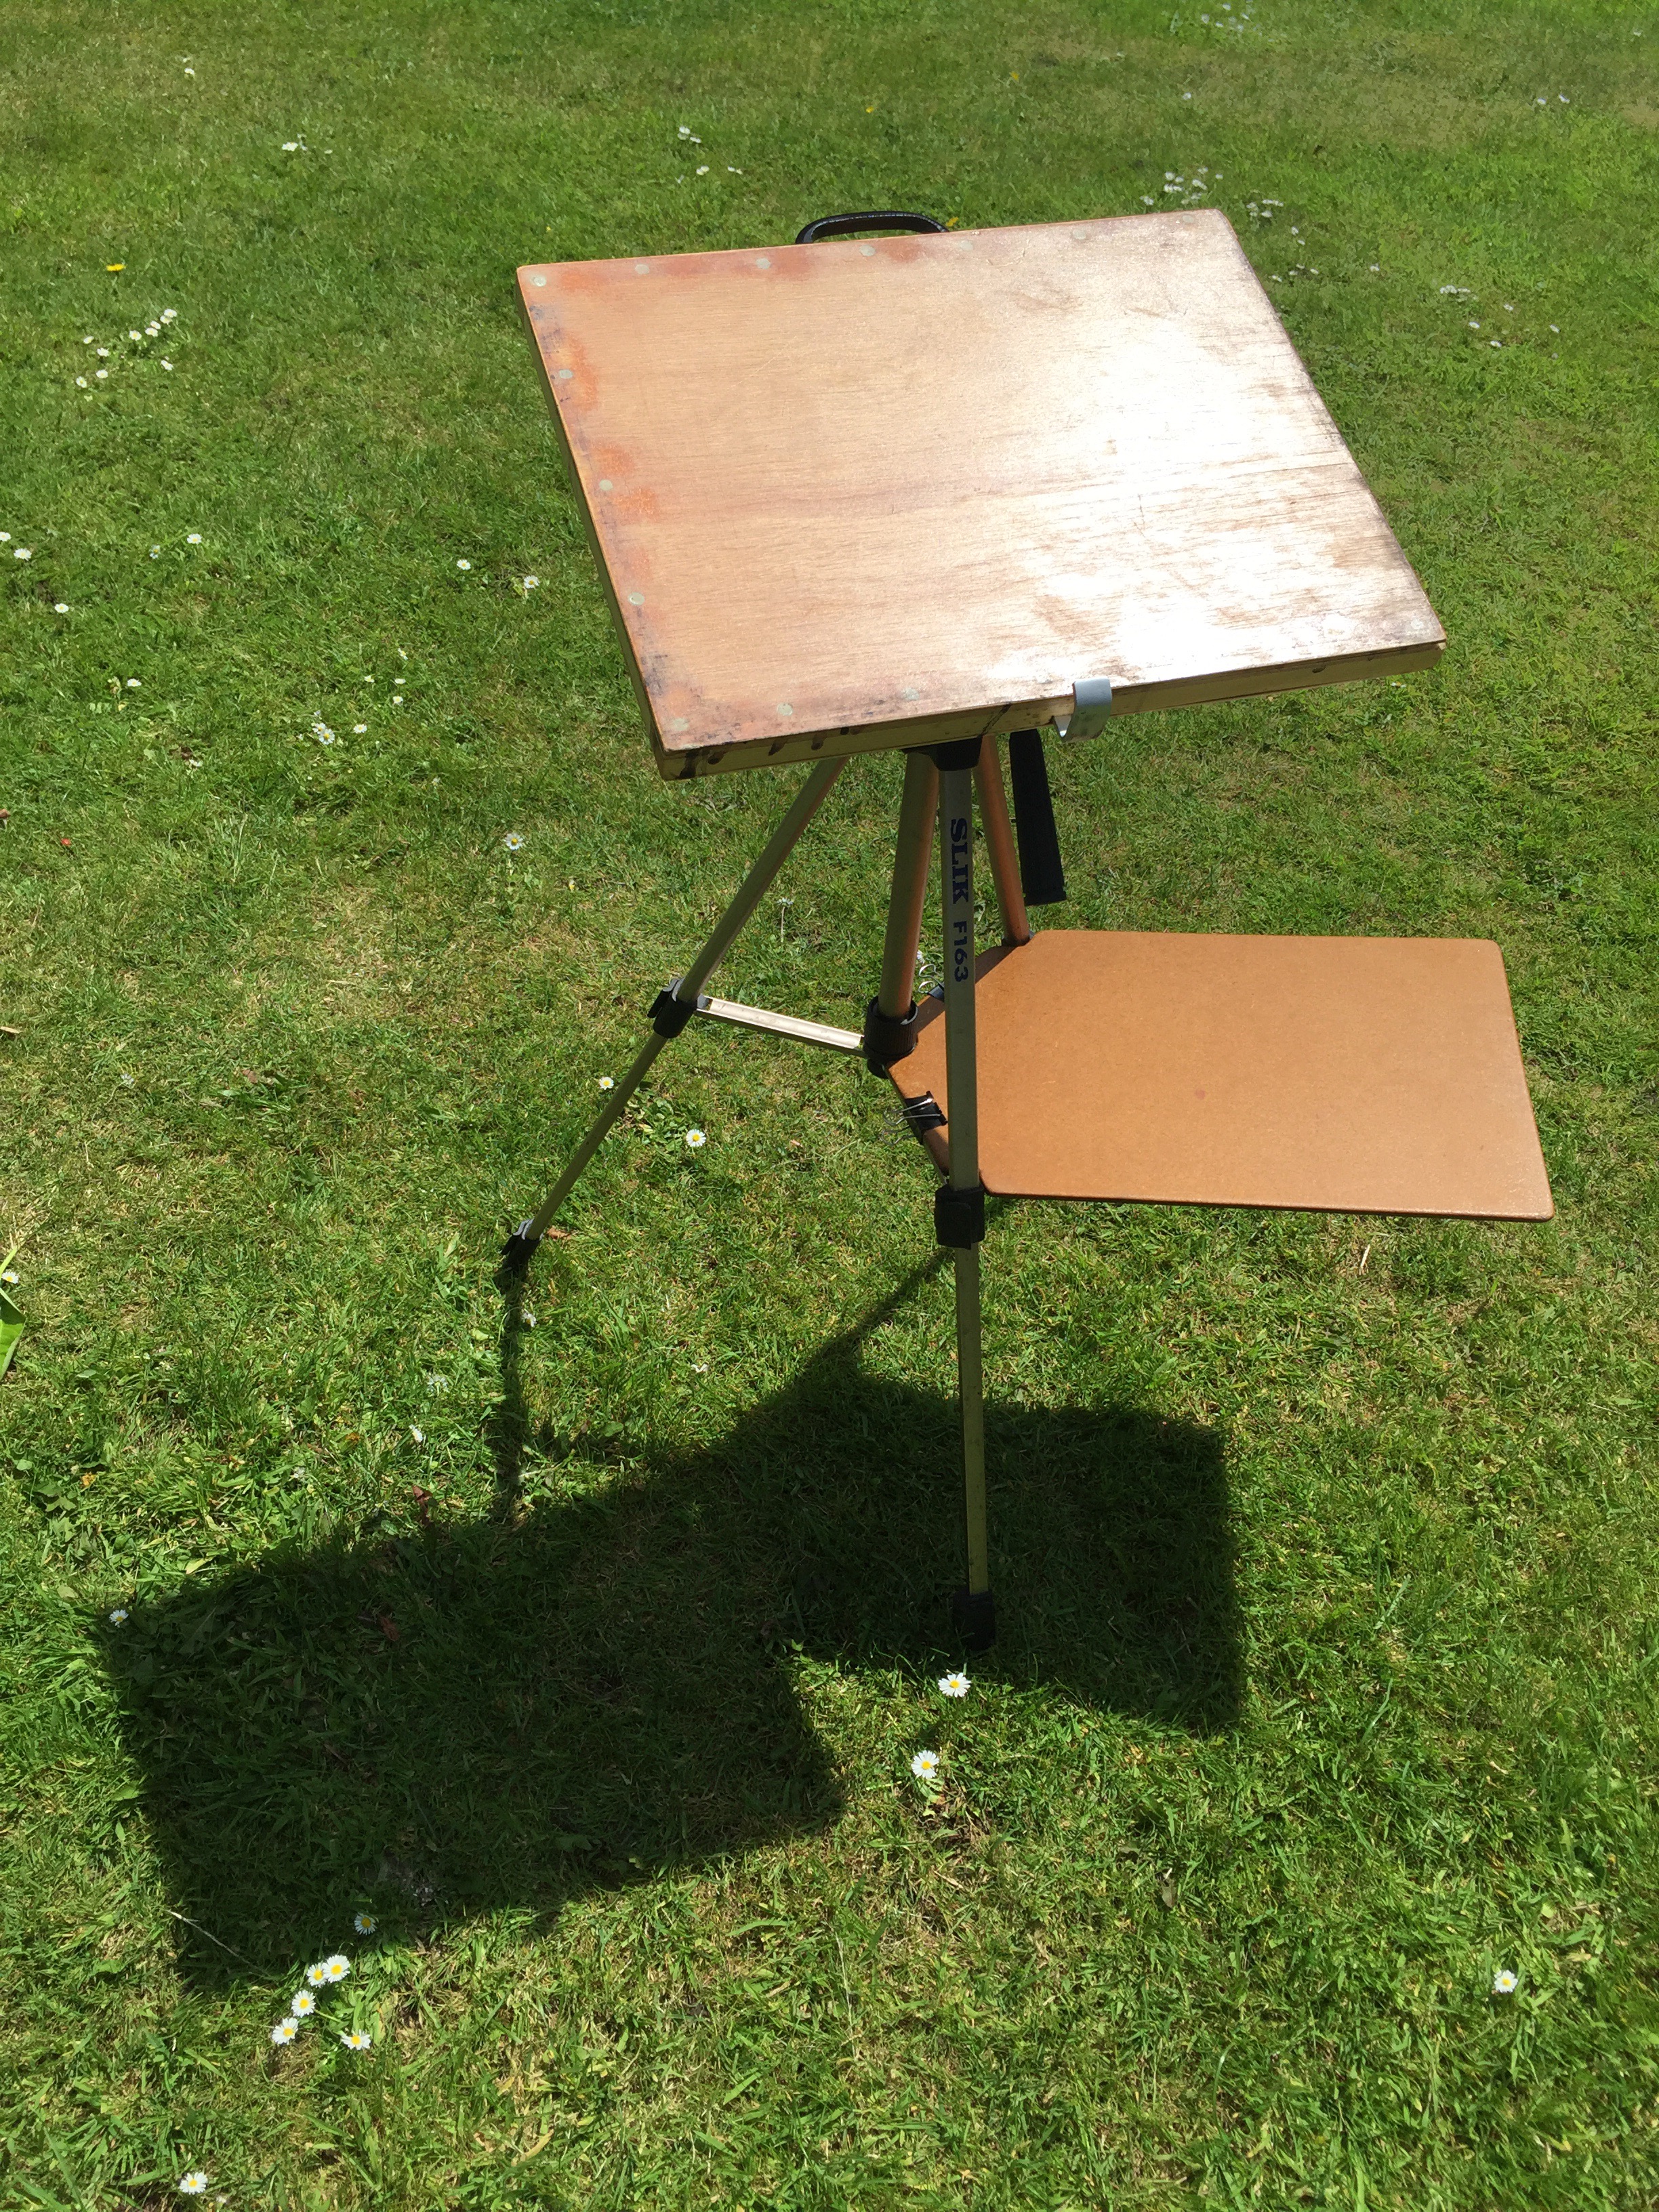
As I think is the case with so many inventions, it was born out of a necessity. How to carry paper safely when painting plein air with the minimum of baggage? I was already using a camera tripod, onto which I’d cobbled together part of an old wooden easel that could take a drawing board, but I wasn’t finding this particularly satisfactory and it didn’t help with my ‘how do I carry the paper?’ dilemma.
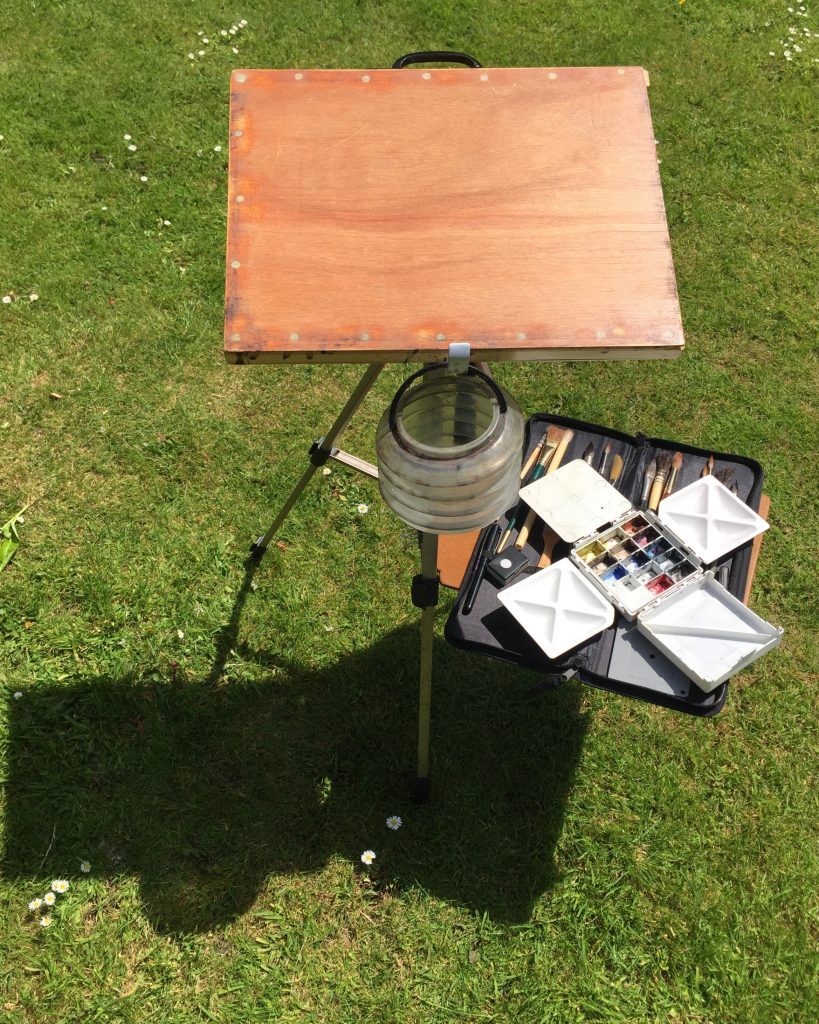
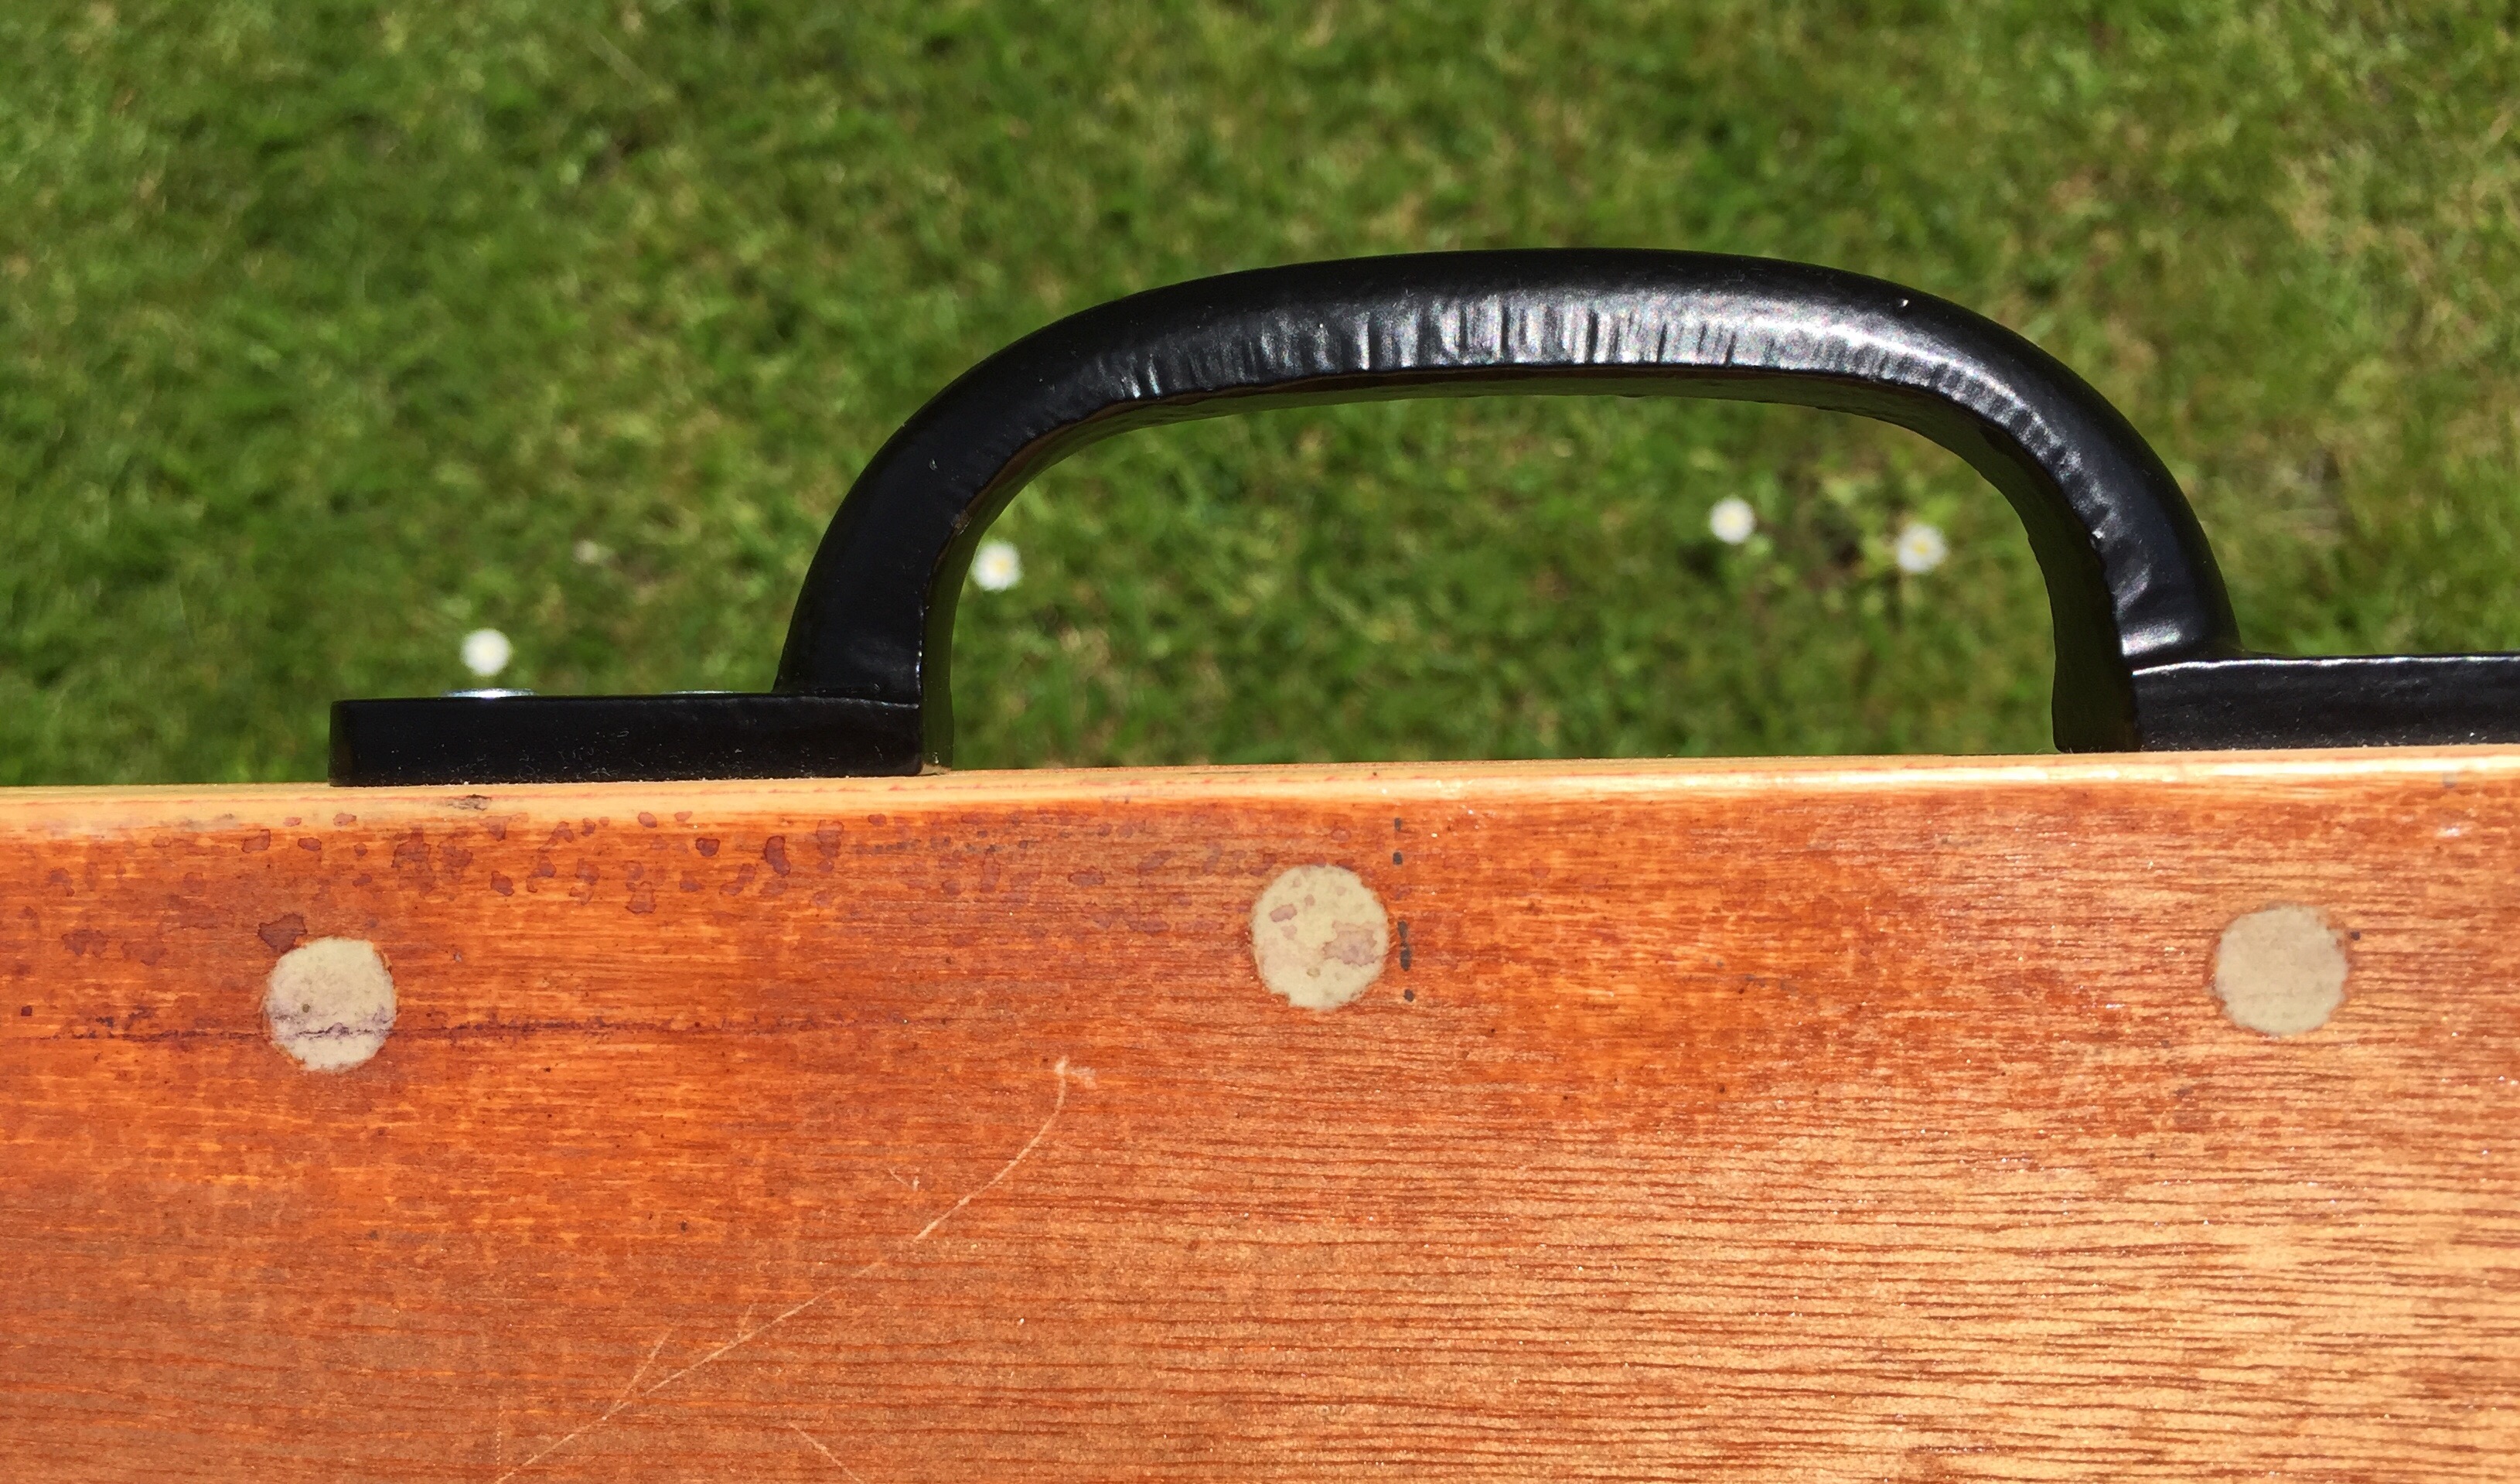
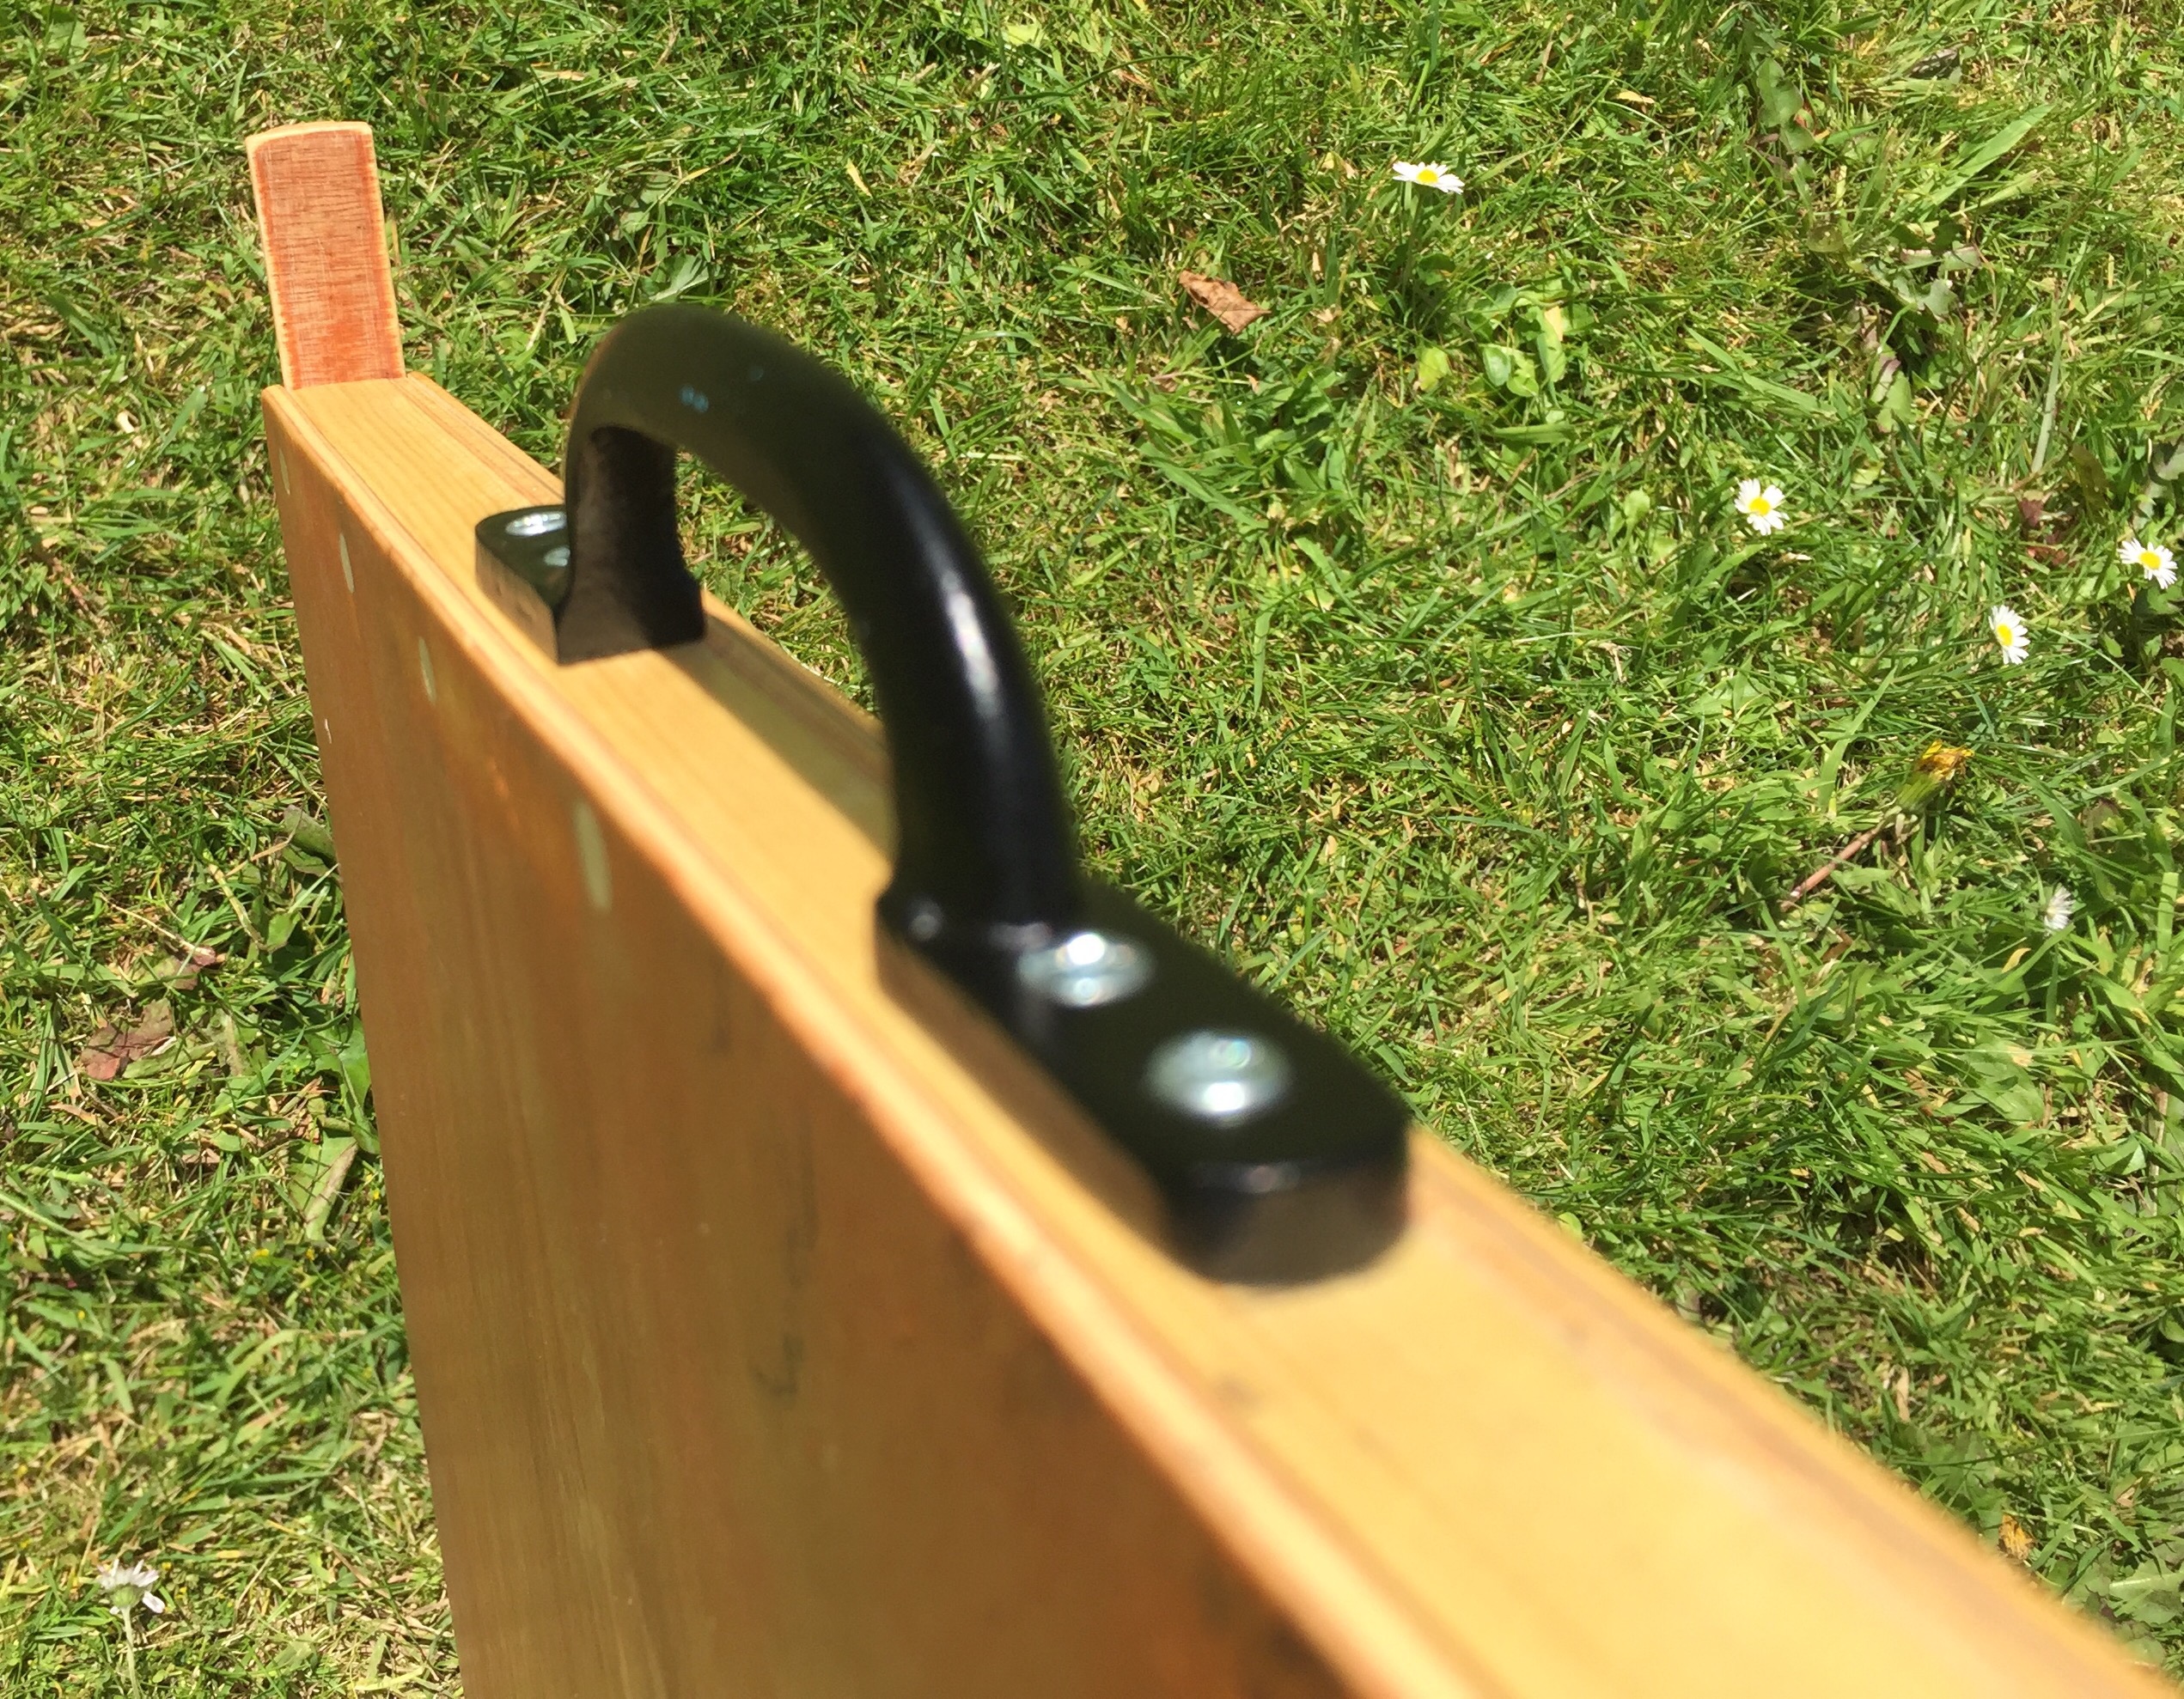
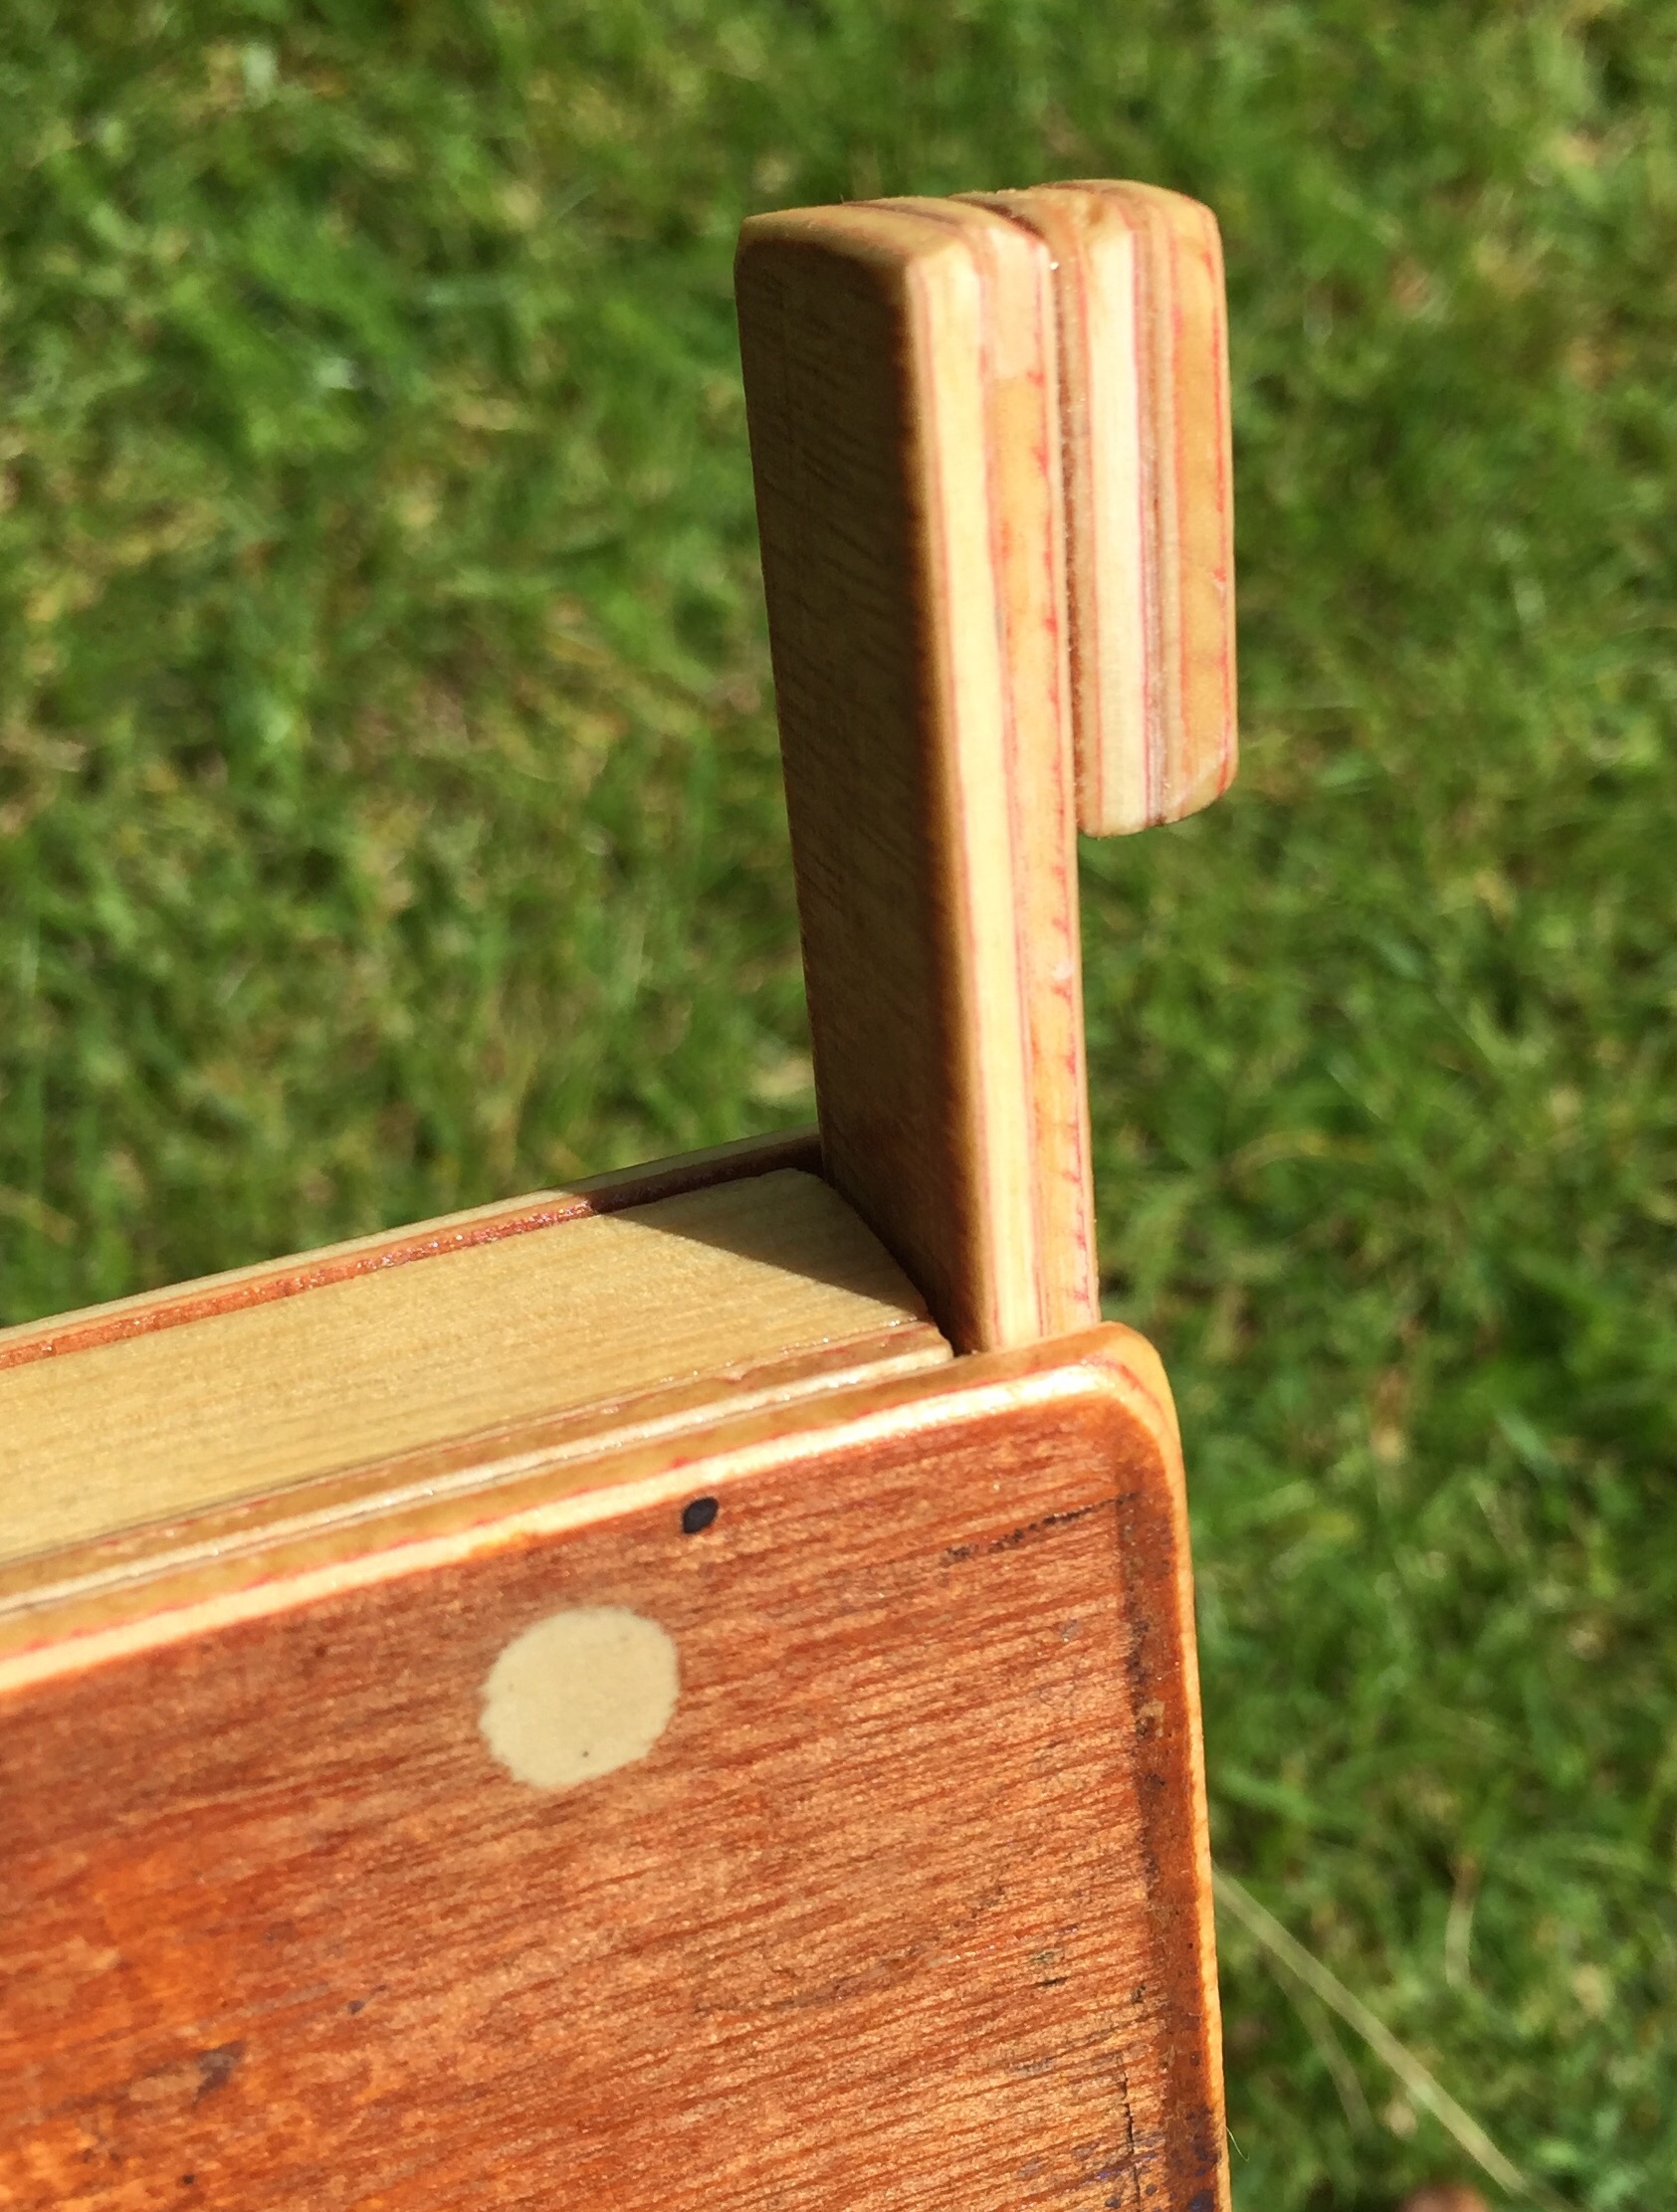
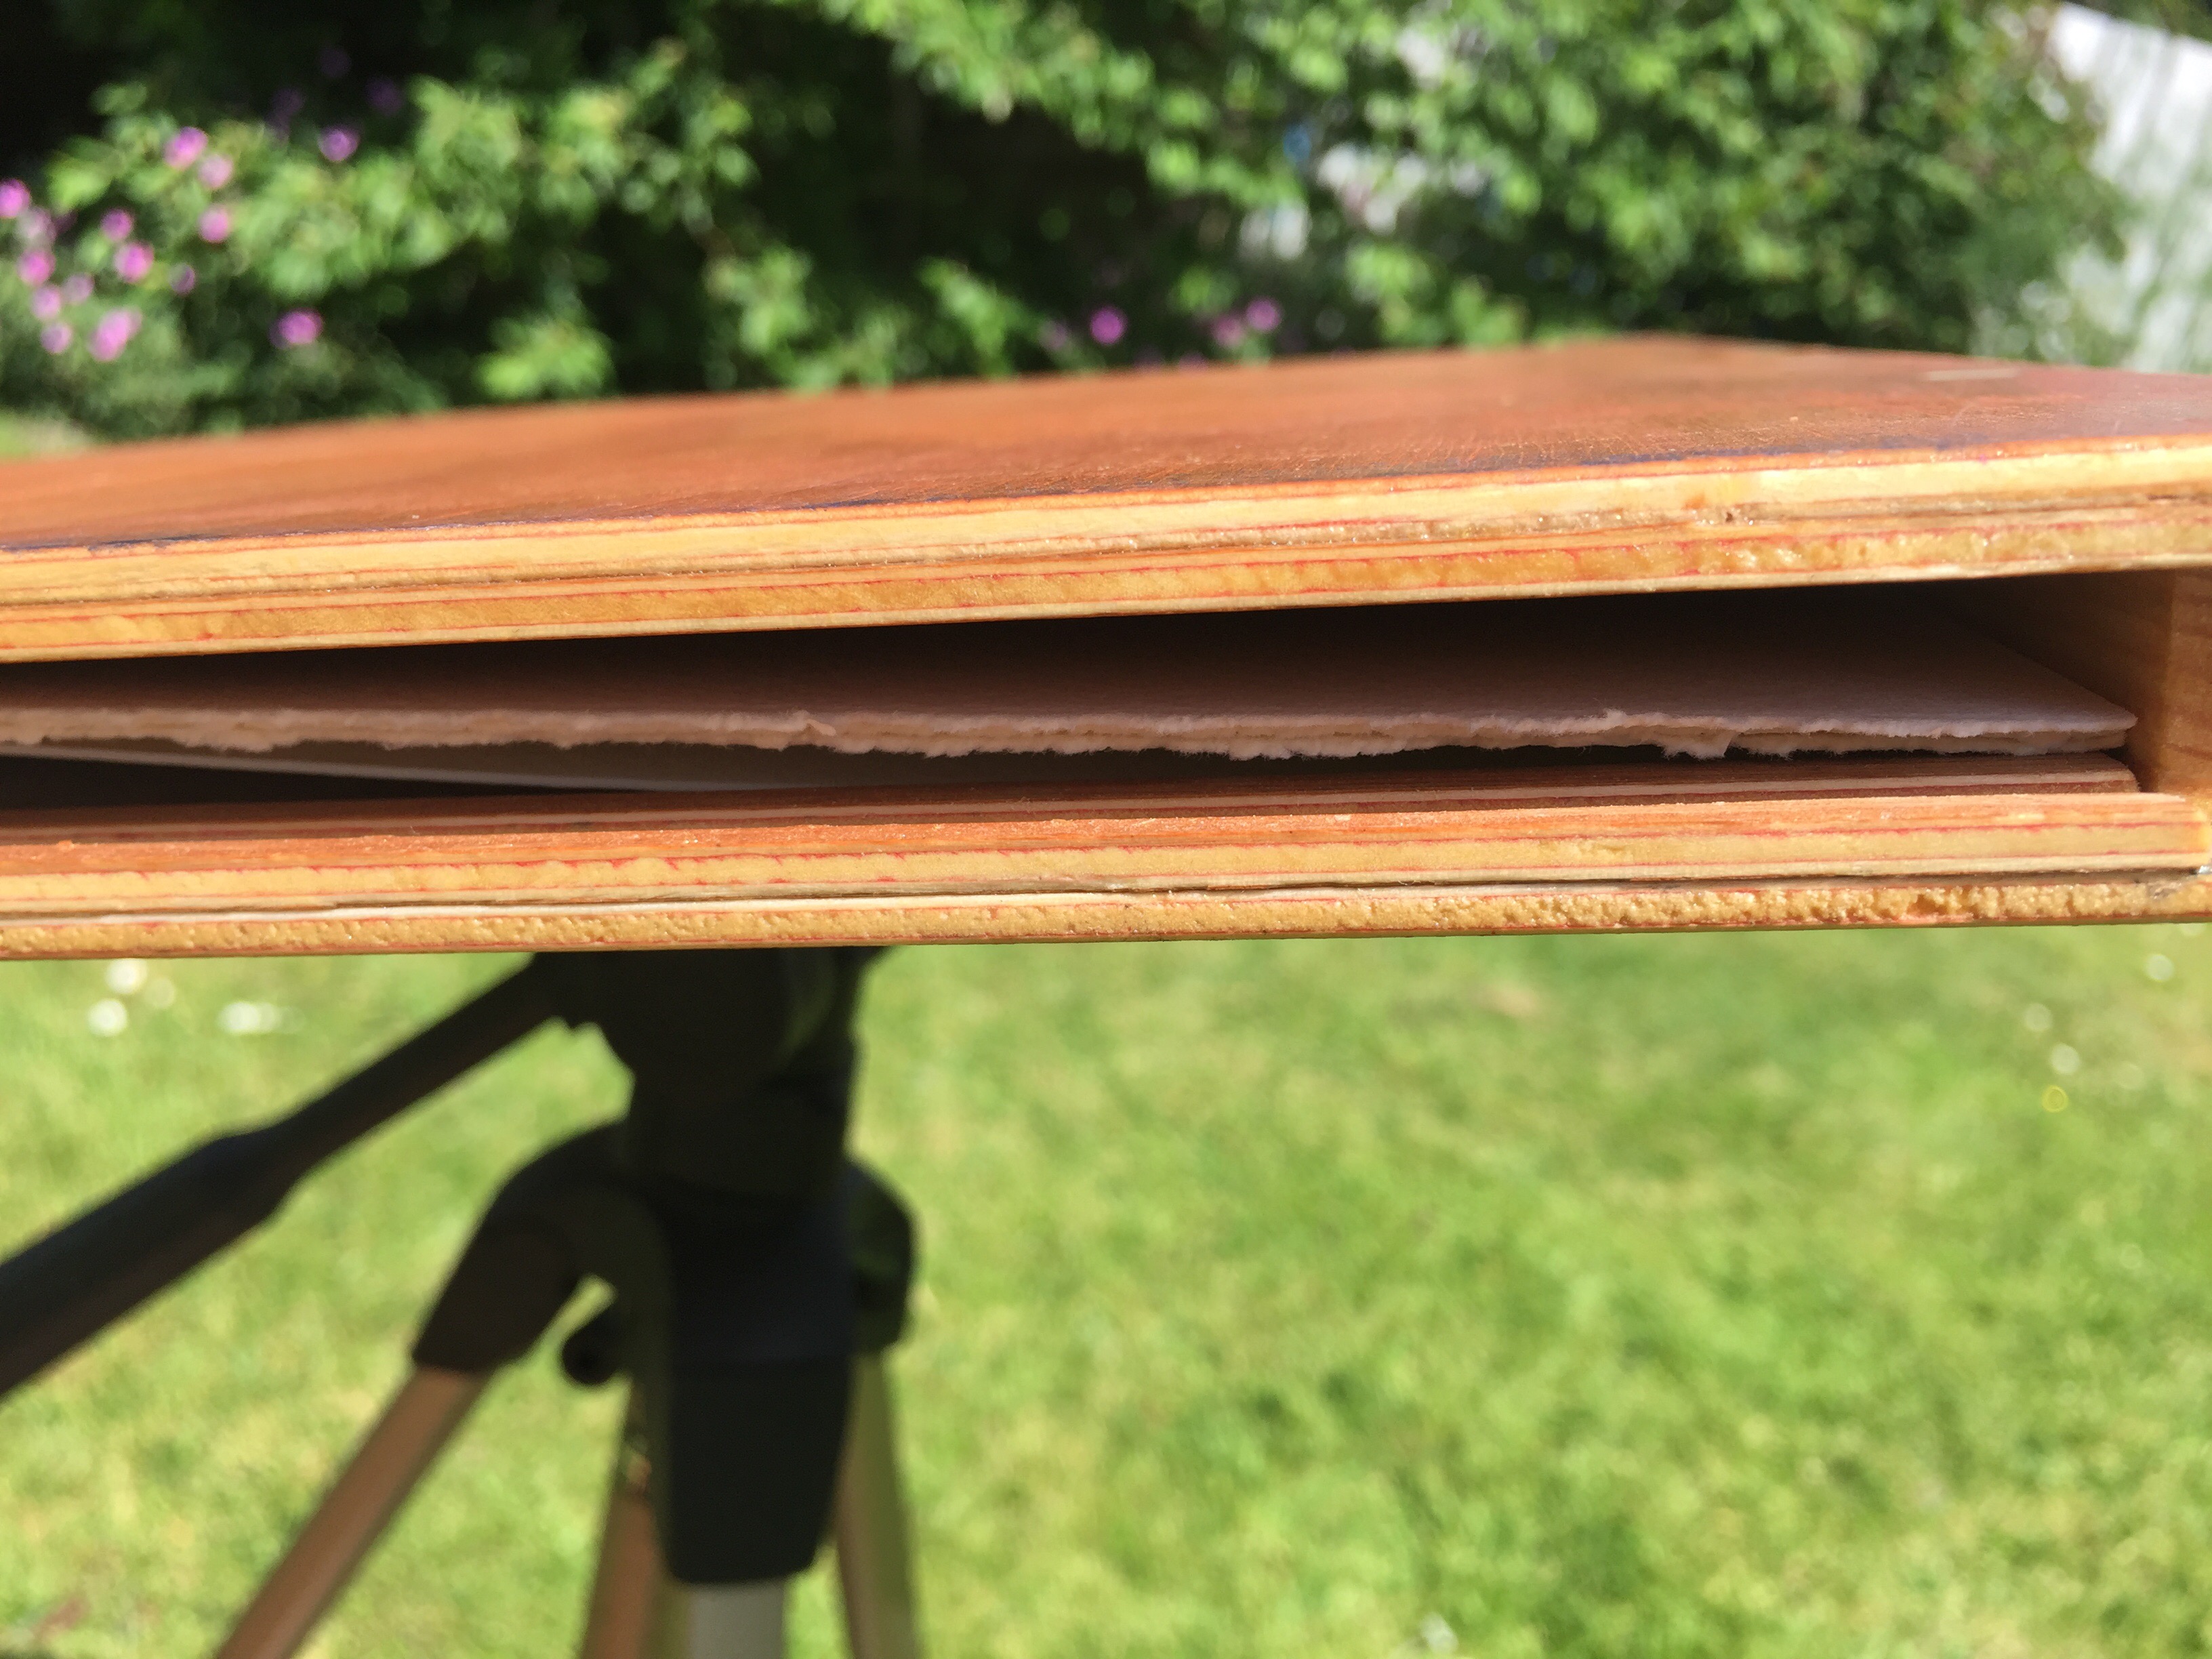
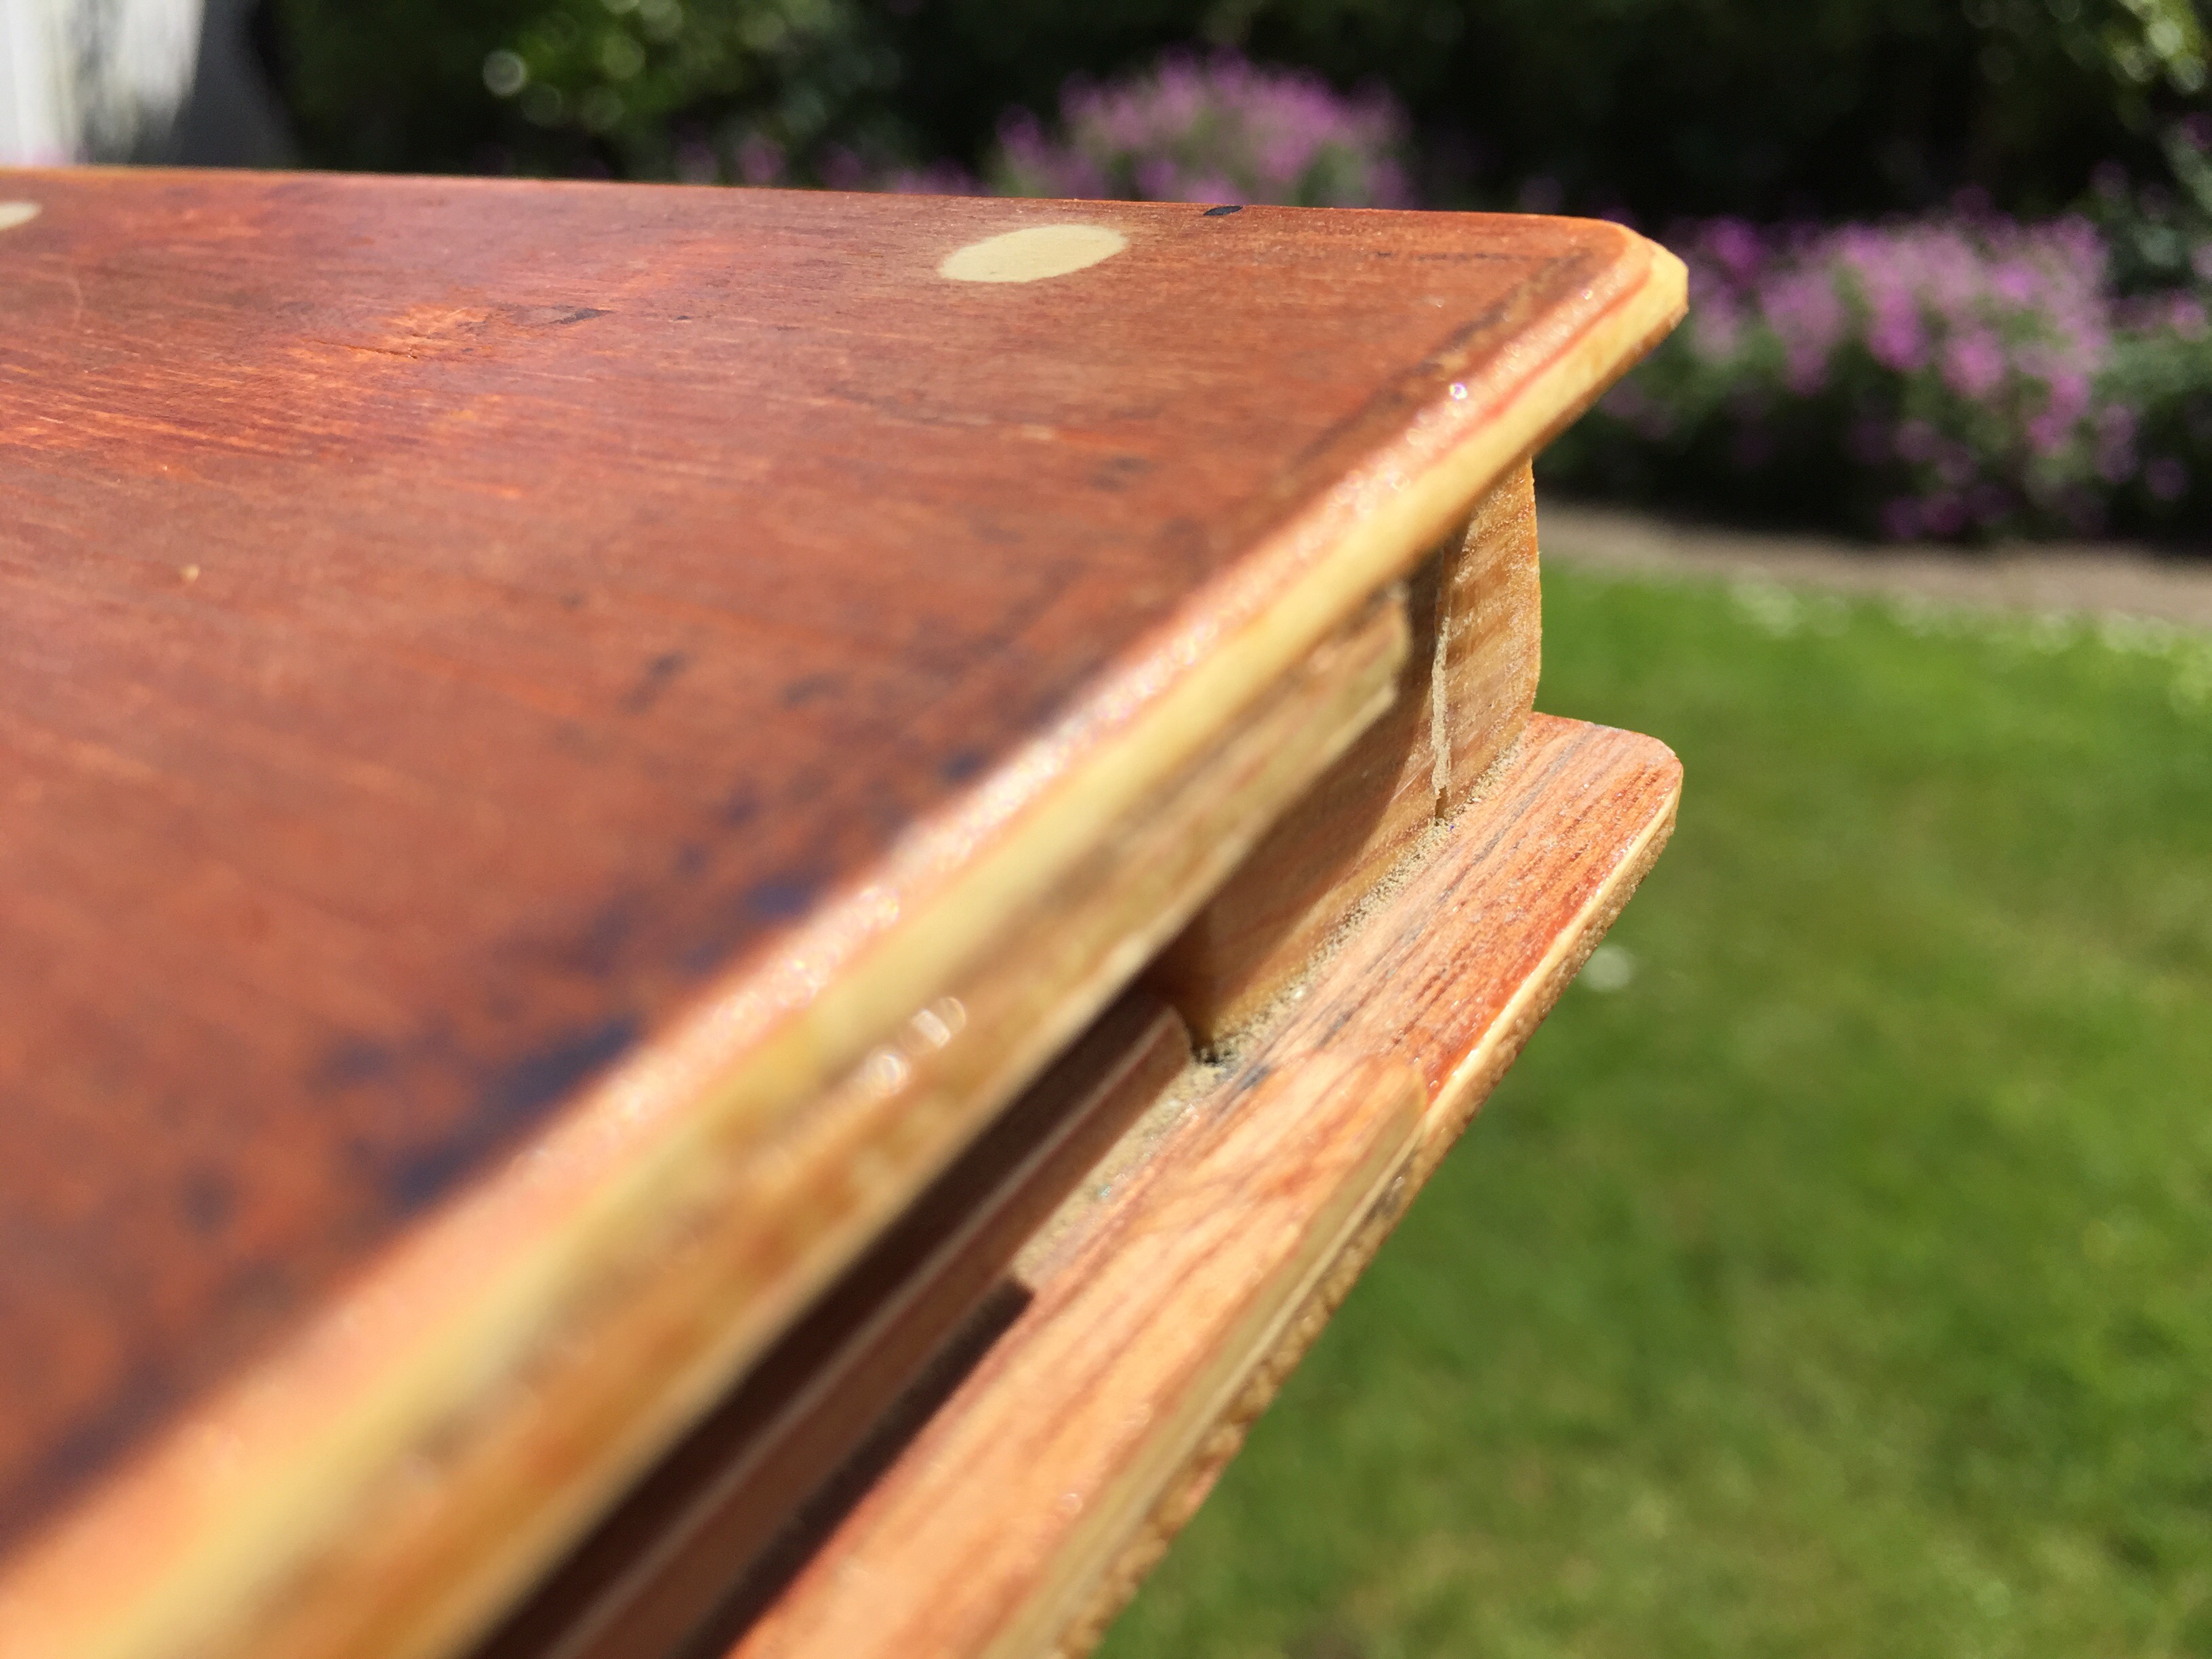
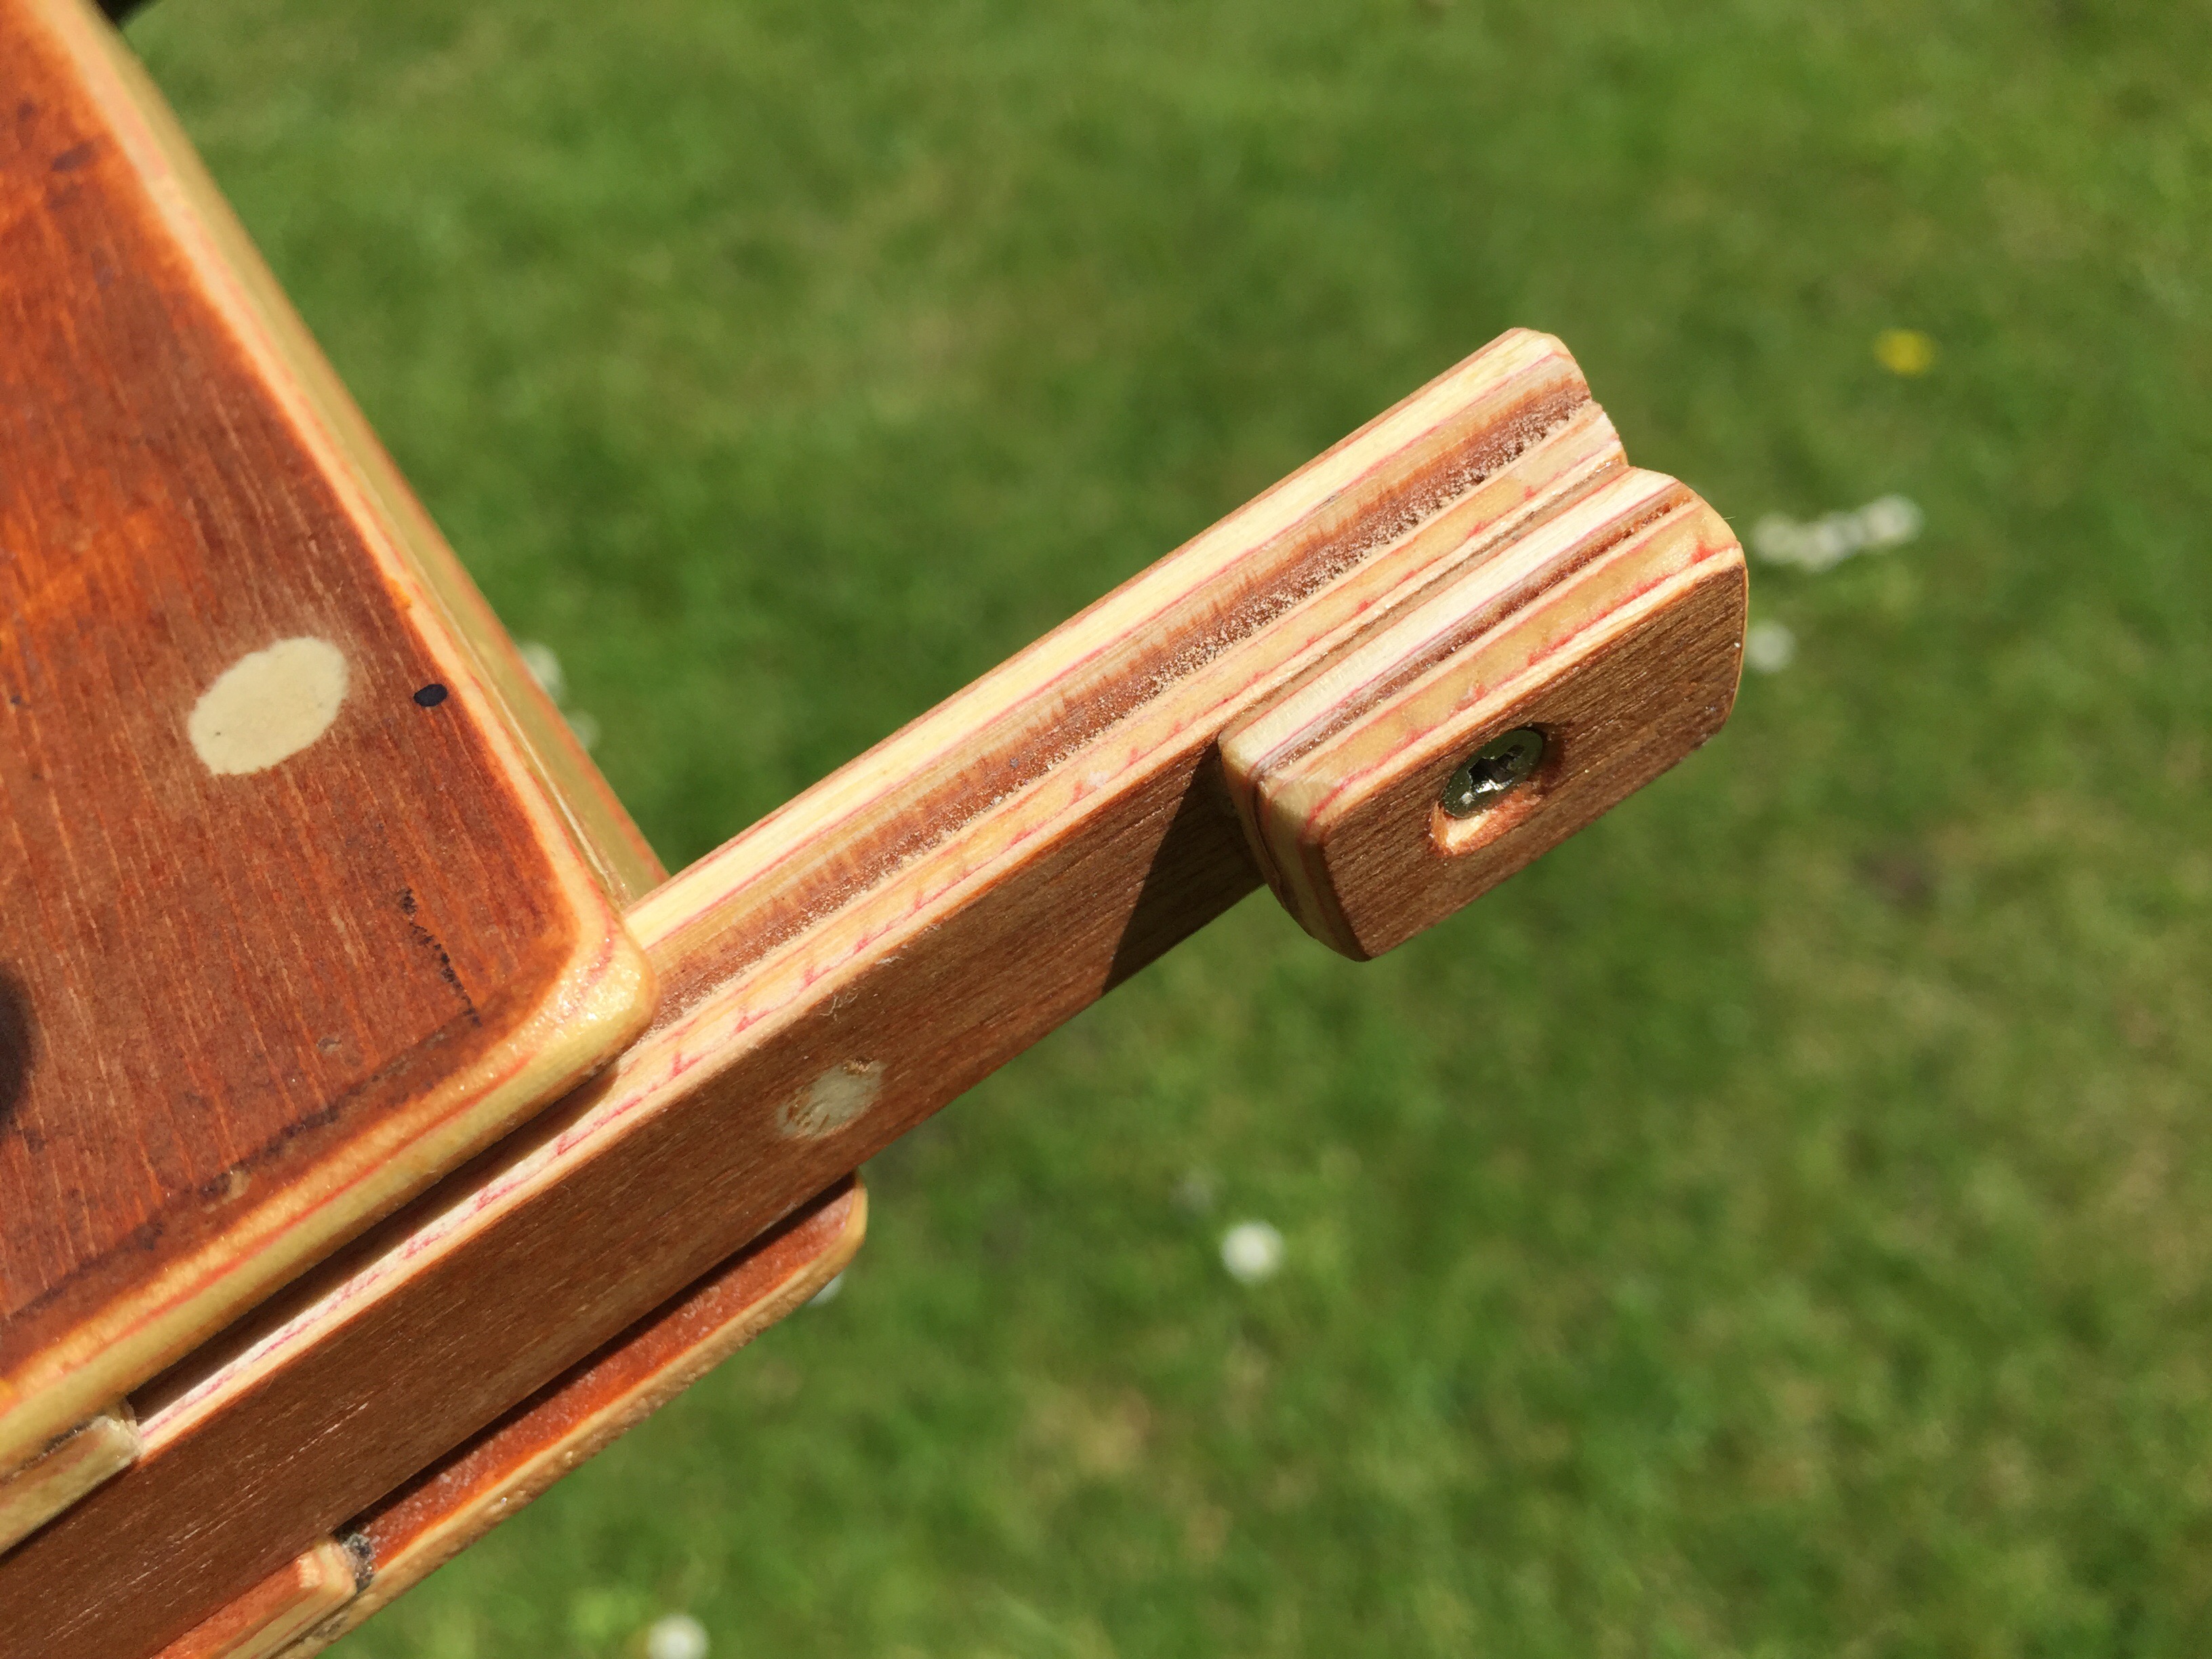
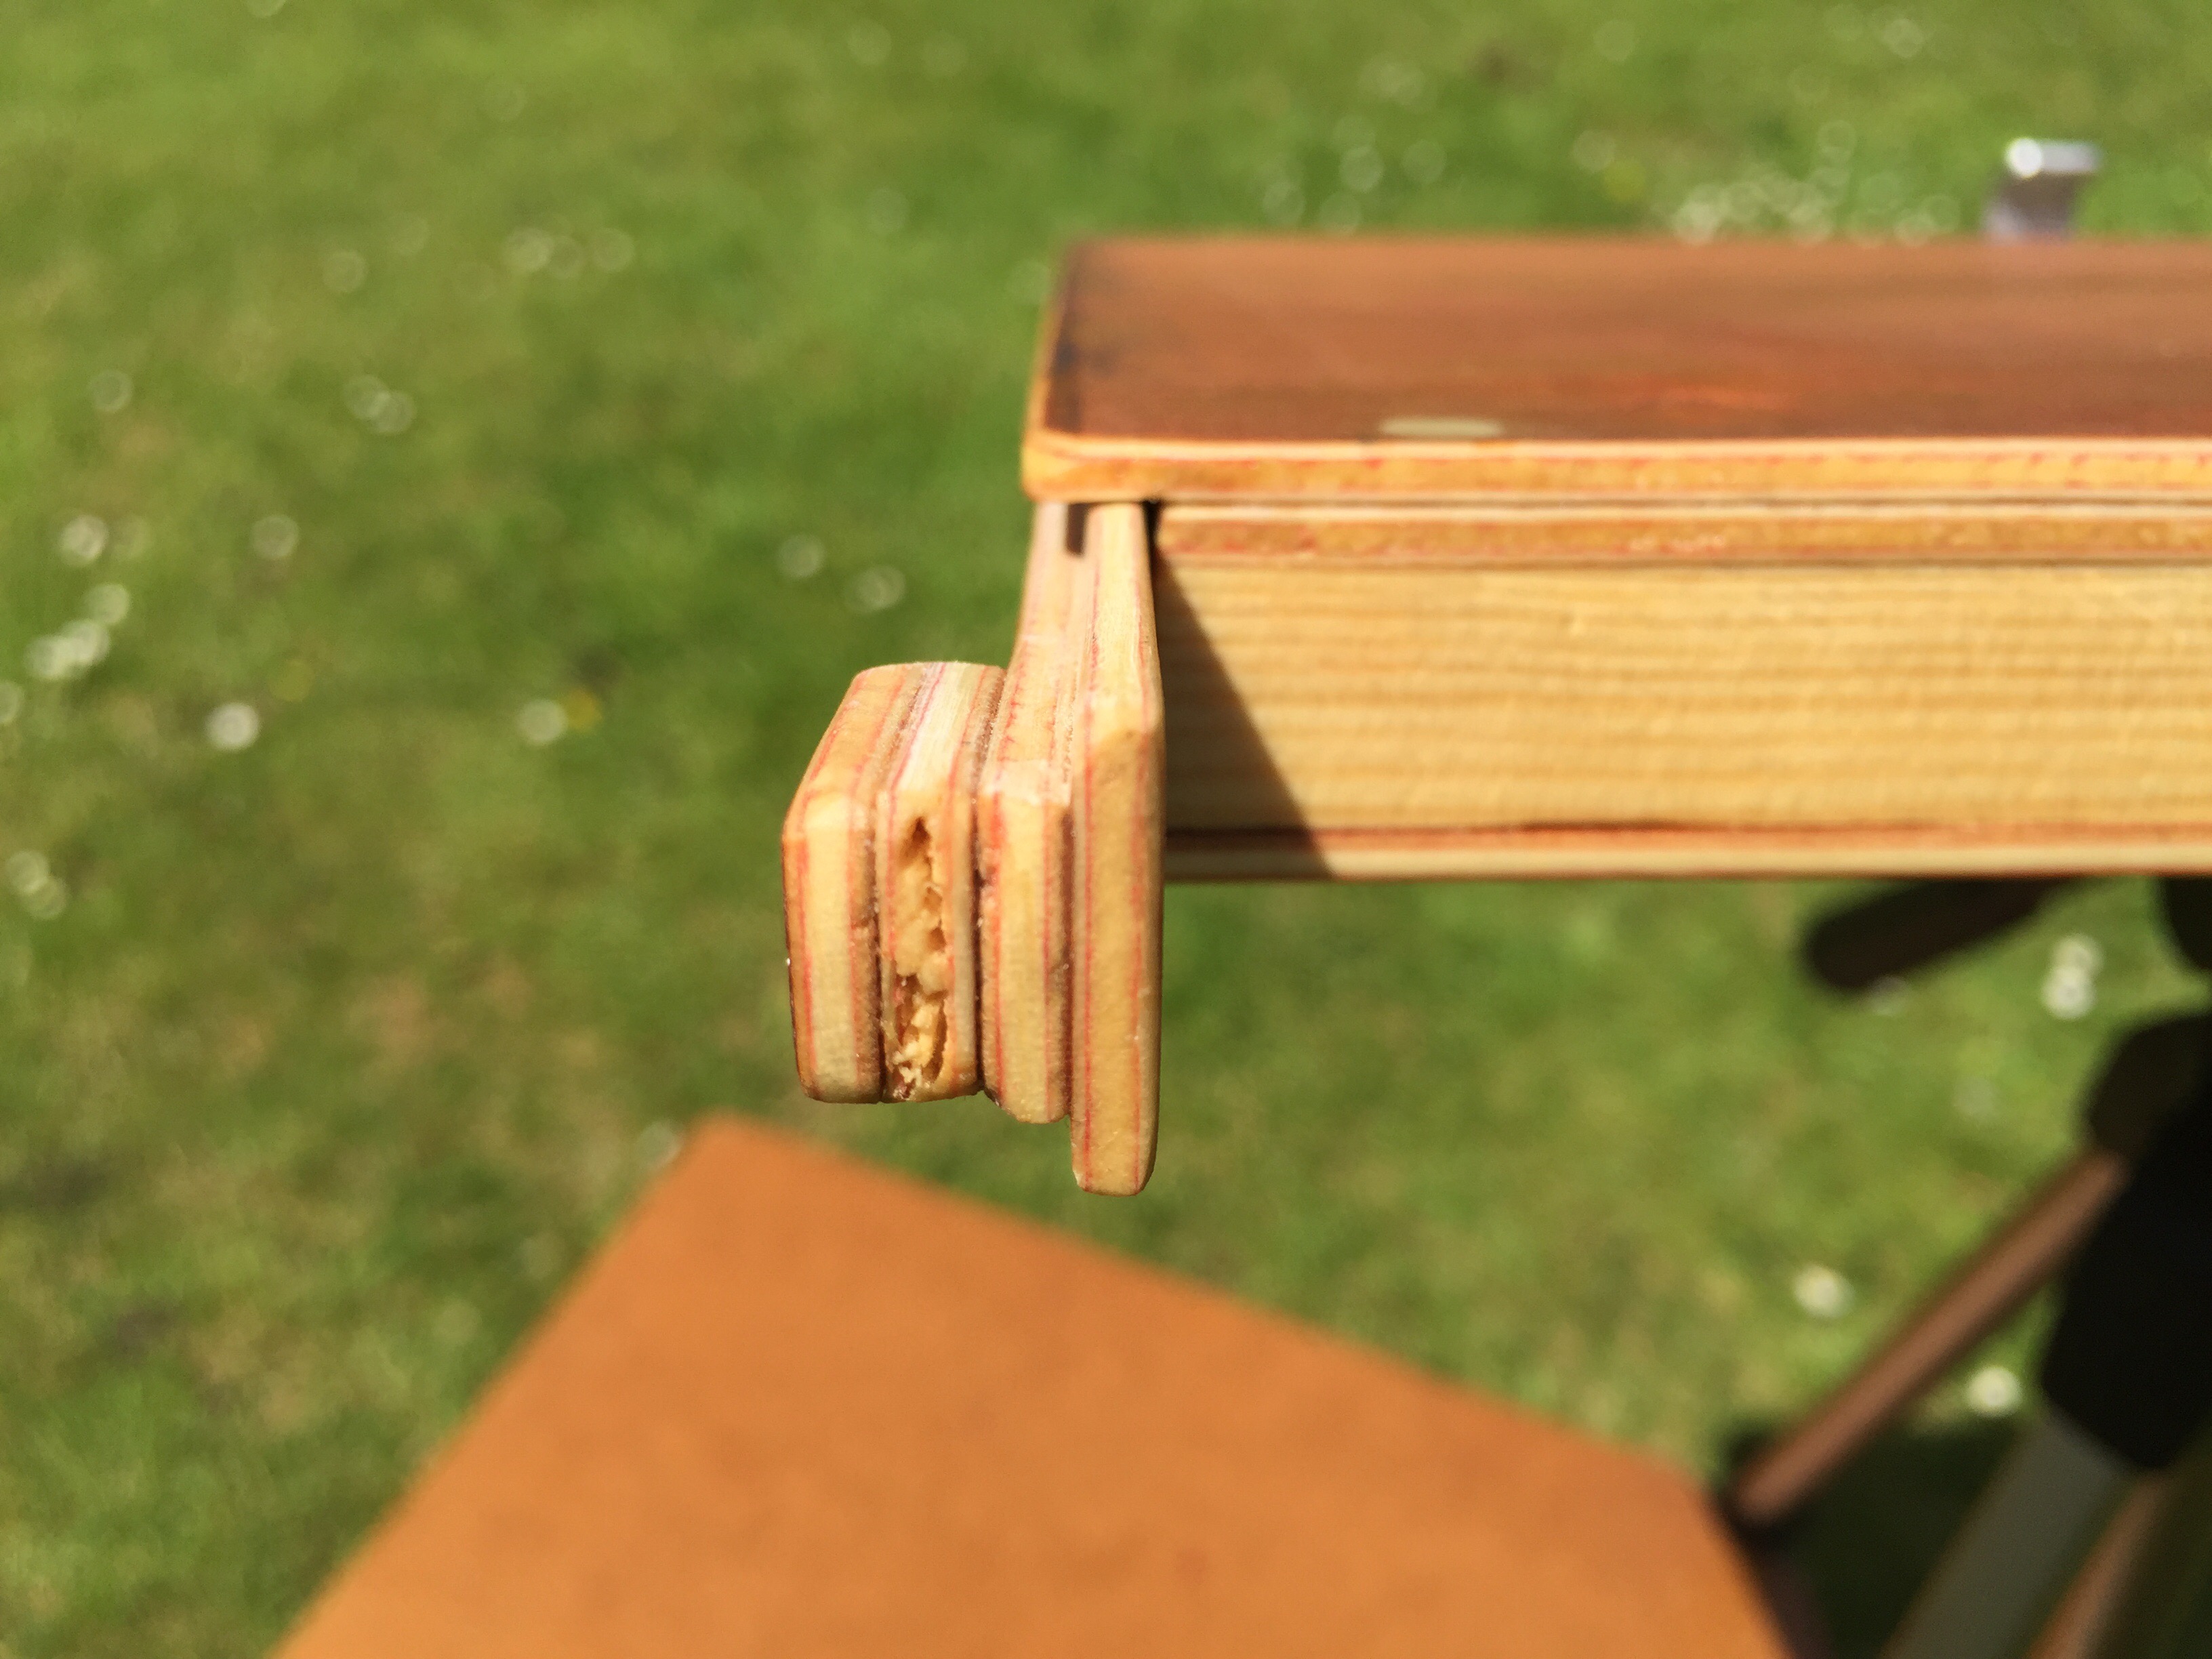
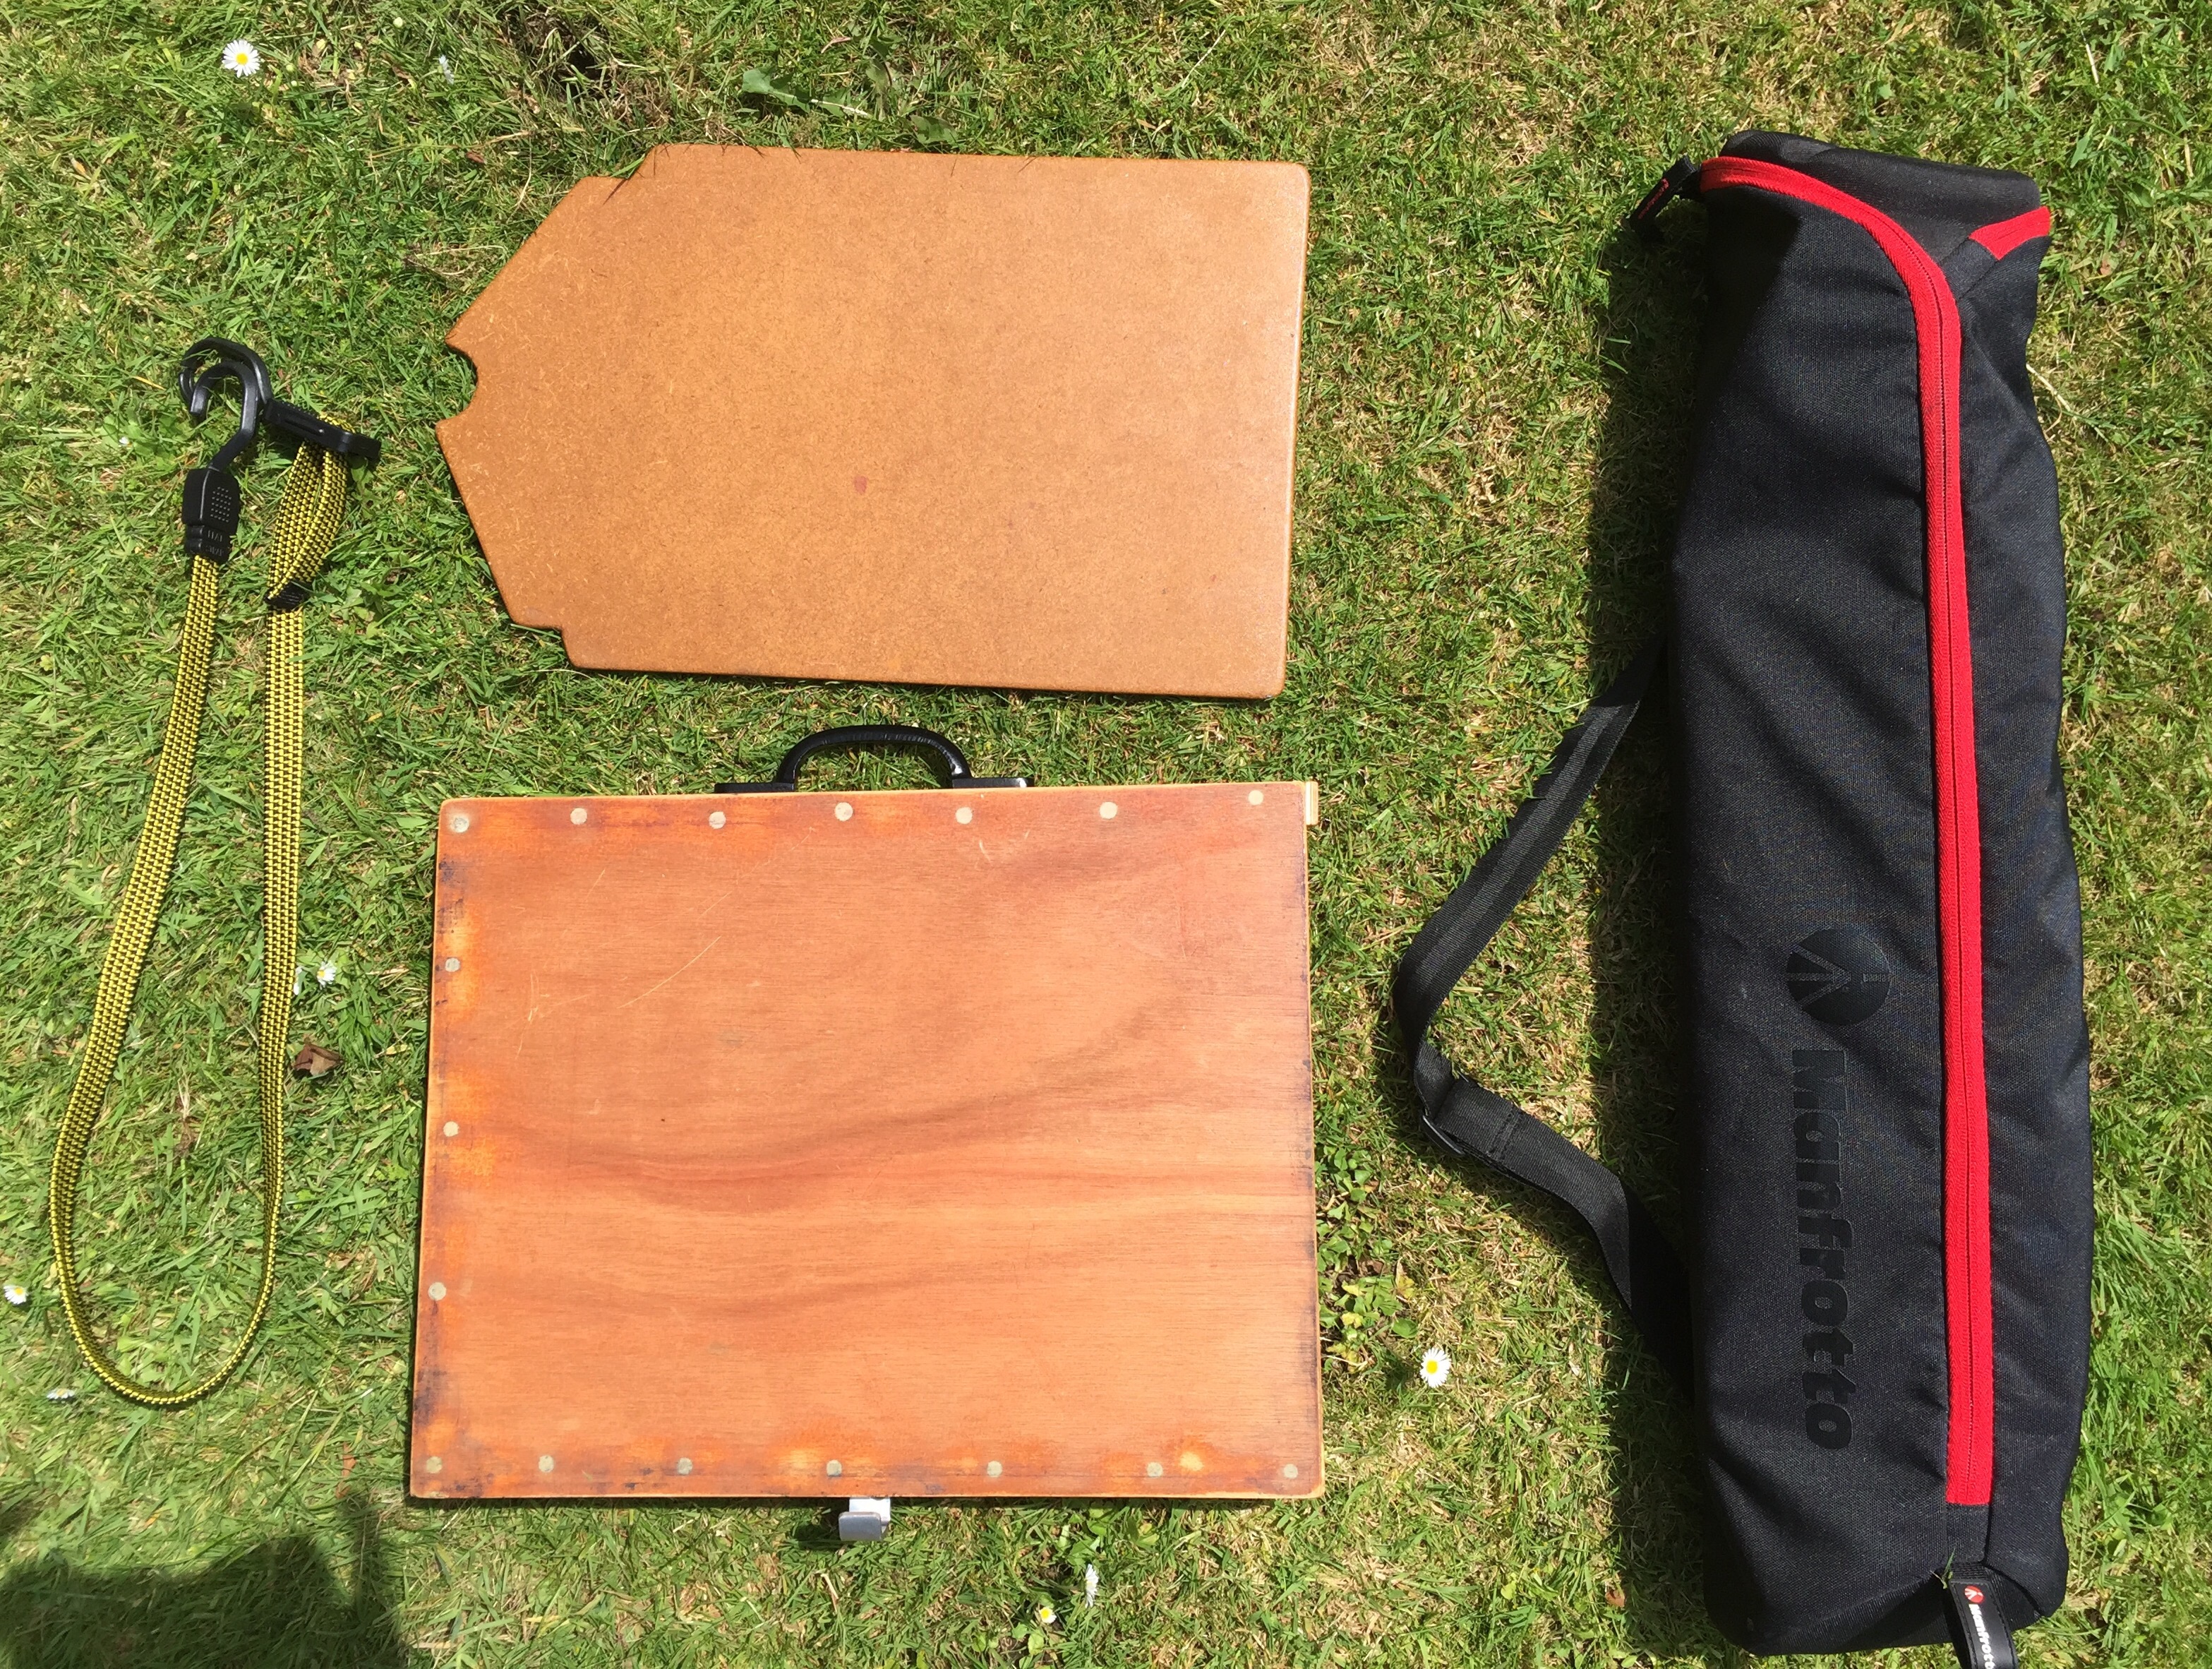
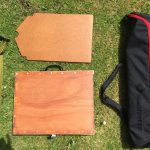
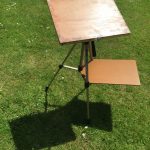
I’d long been an admirer of the small pochade boxes that are available to oil painters, many of which include some grooves that can accommodate small panels for painting on and keep them safely apart. This seemed like an eminently sensible approach and one that I thought could be adapted for my own purposes. So, here’re some images of my board that will hopefully show how it was made more succinctly that I’m able to do with words.
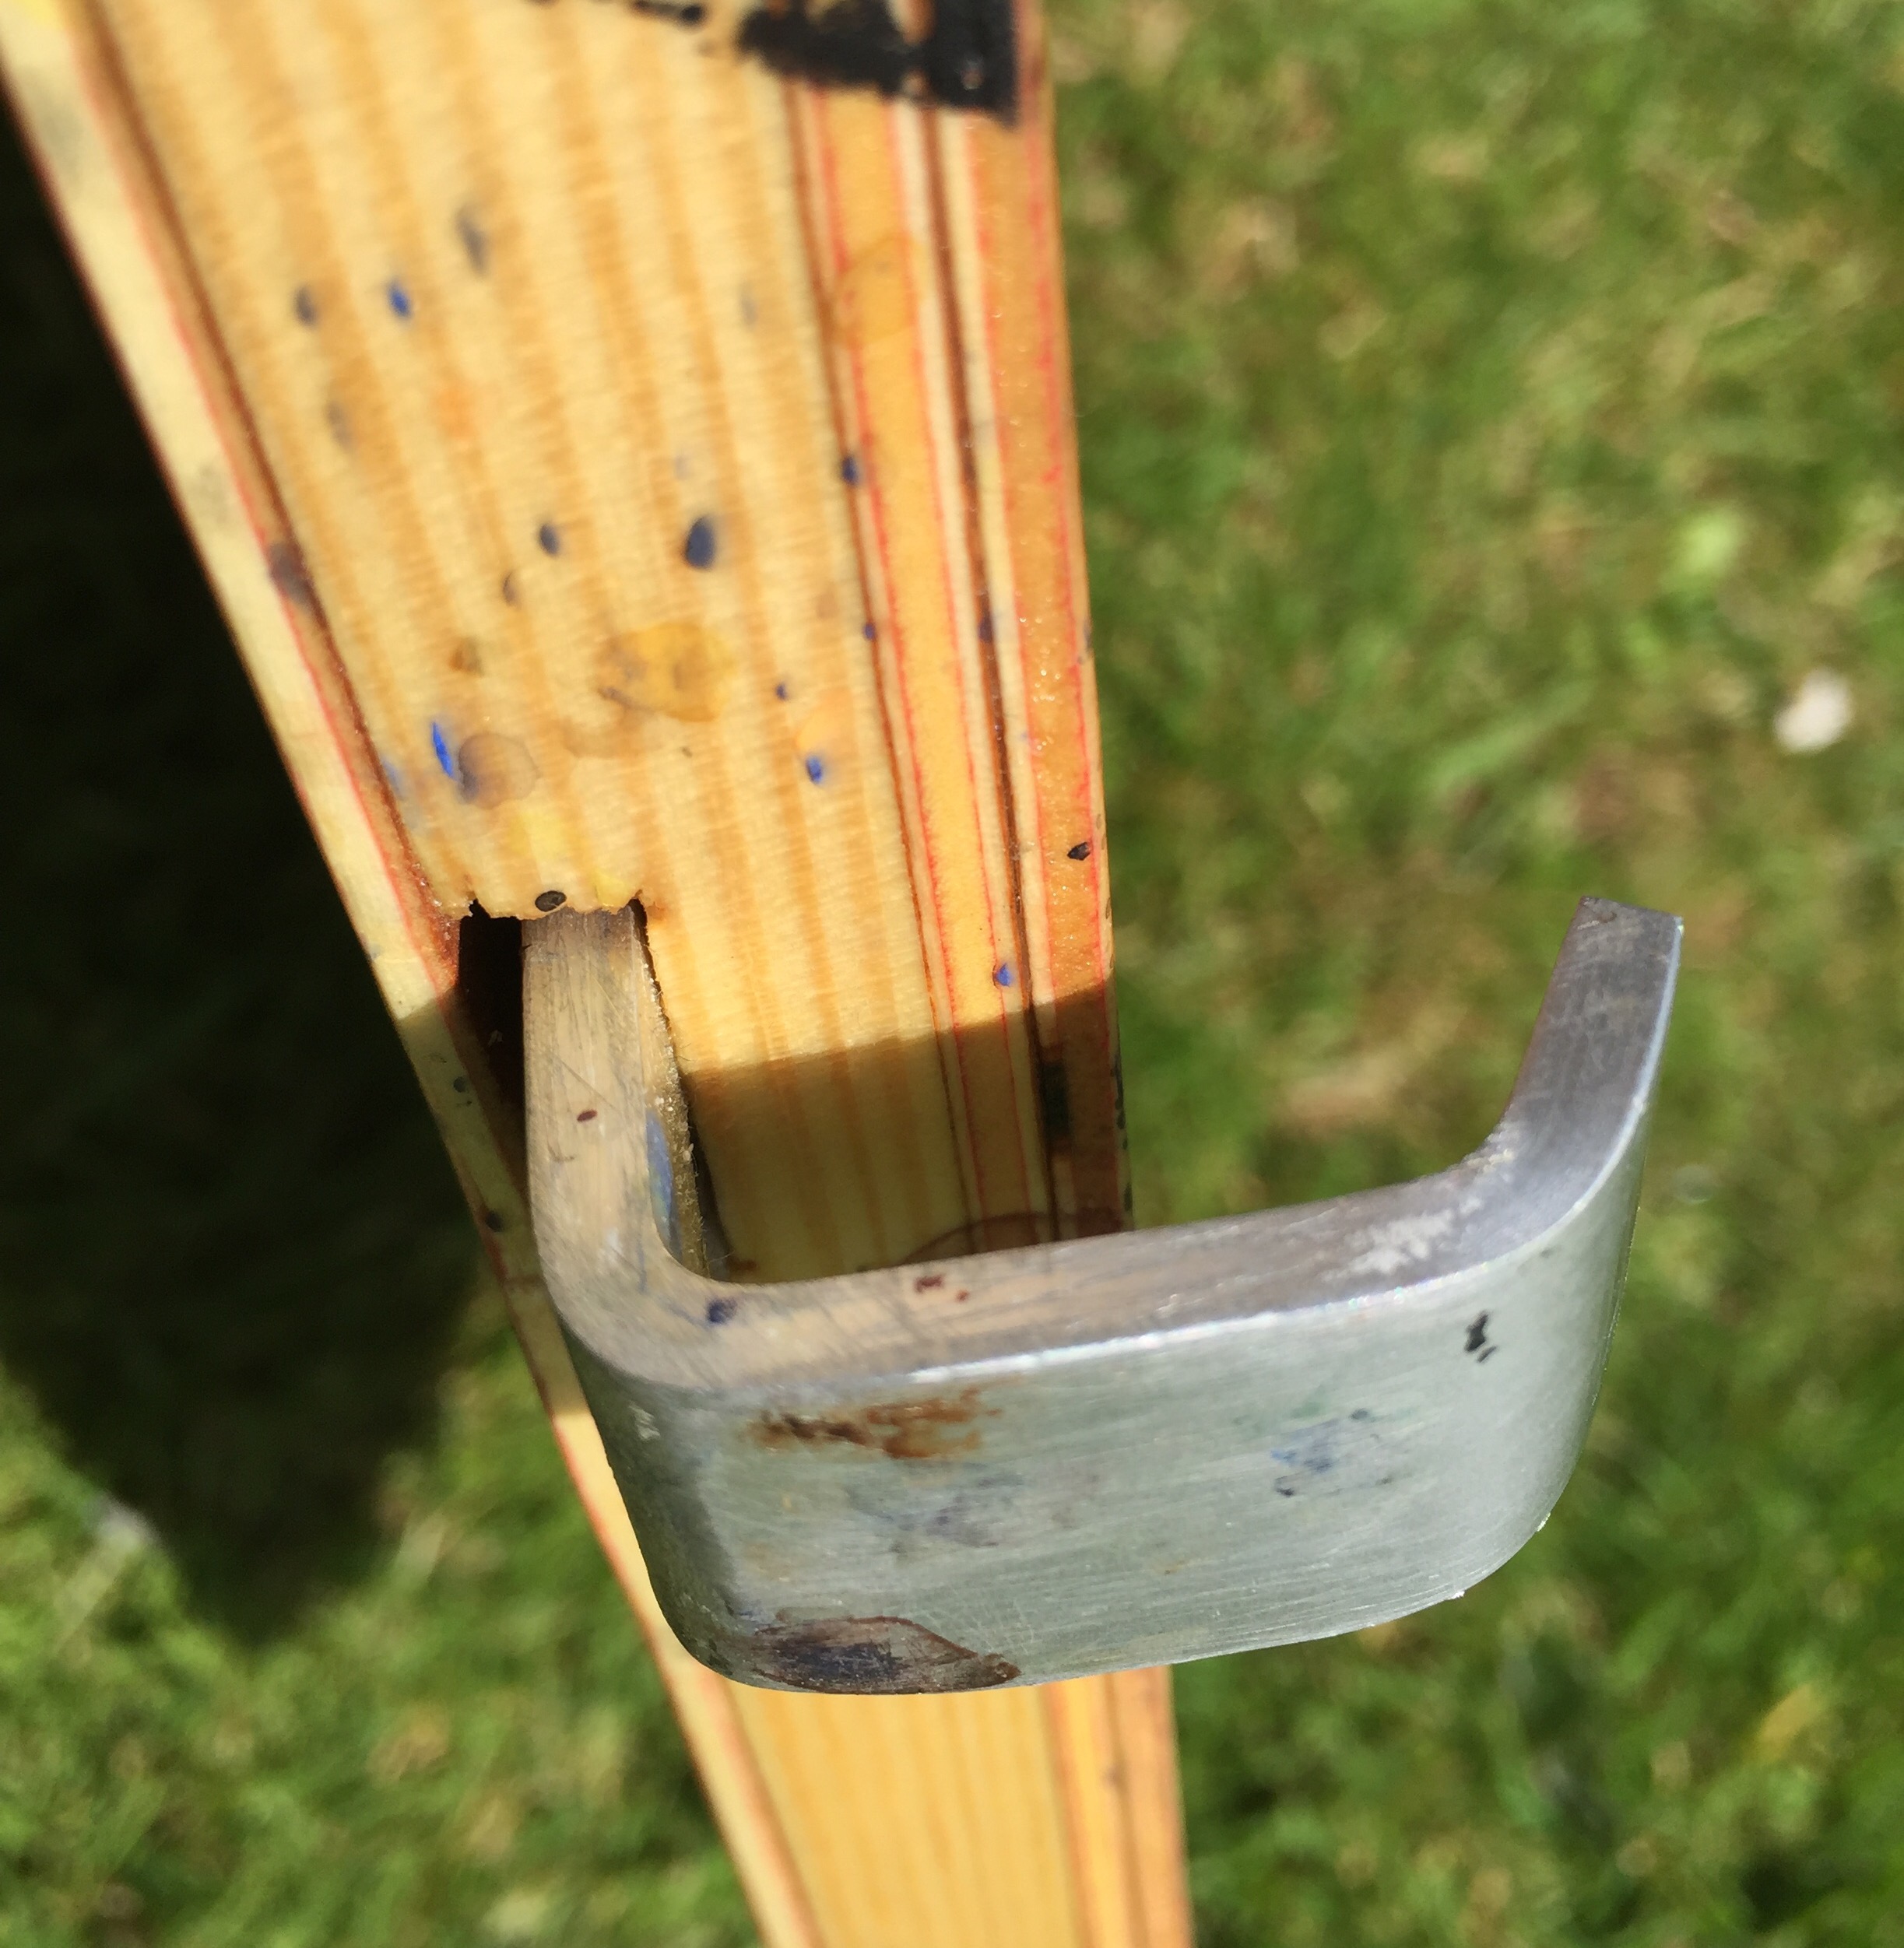
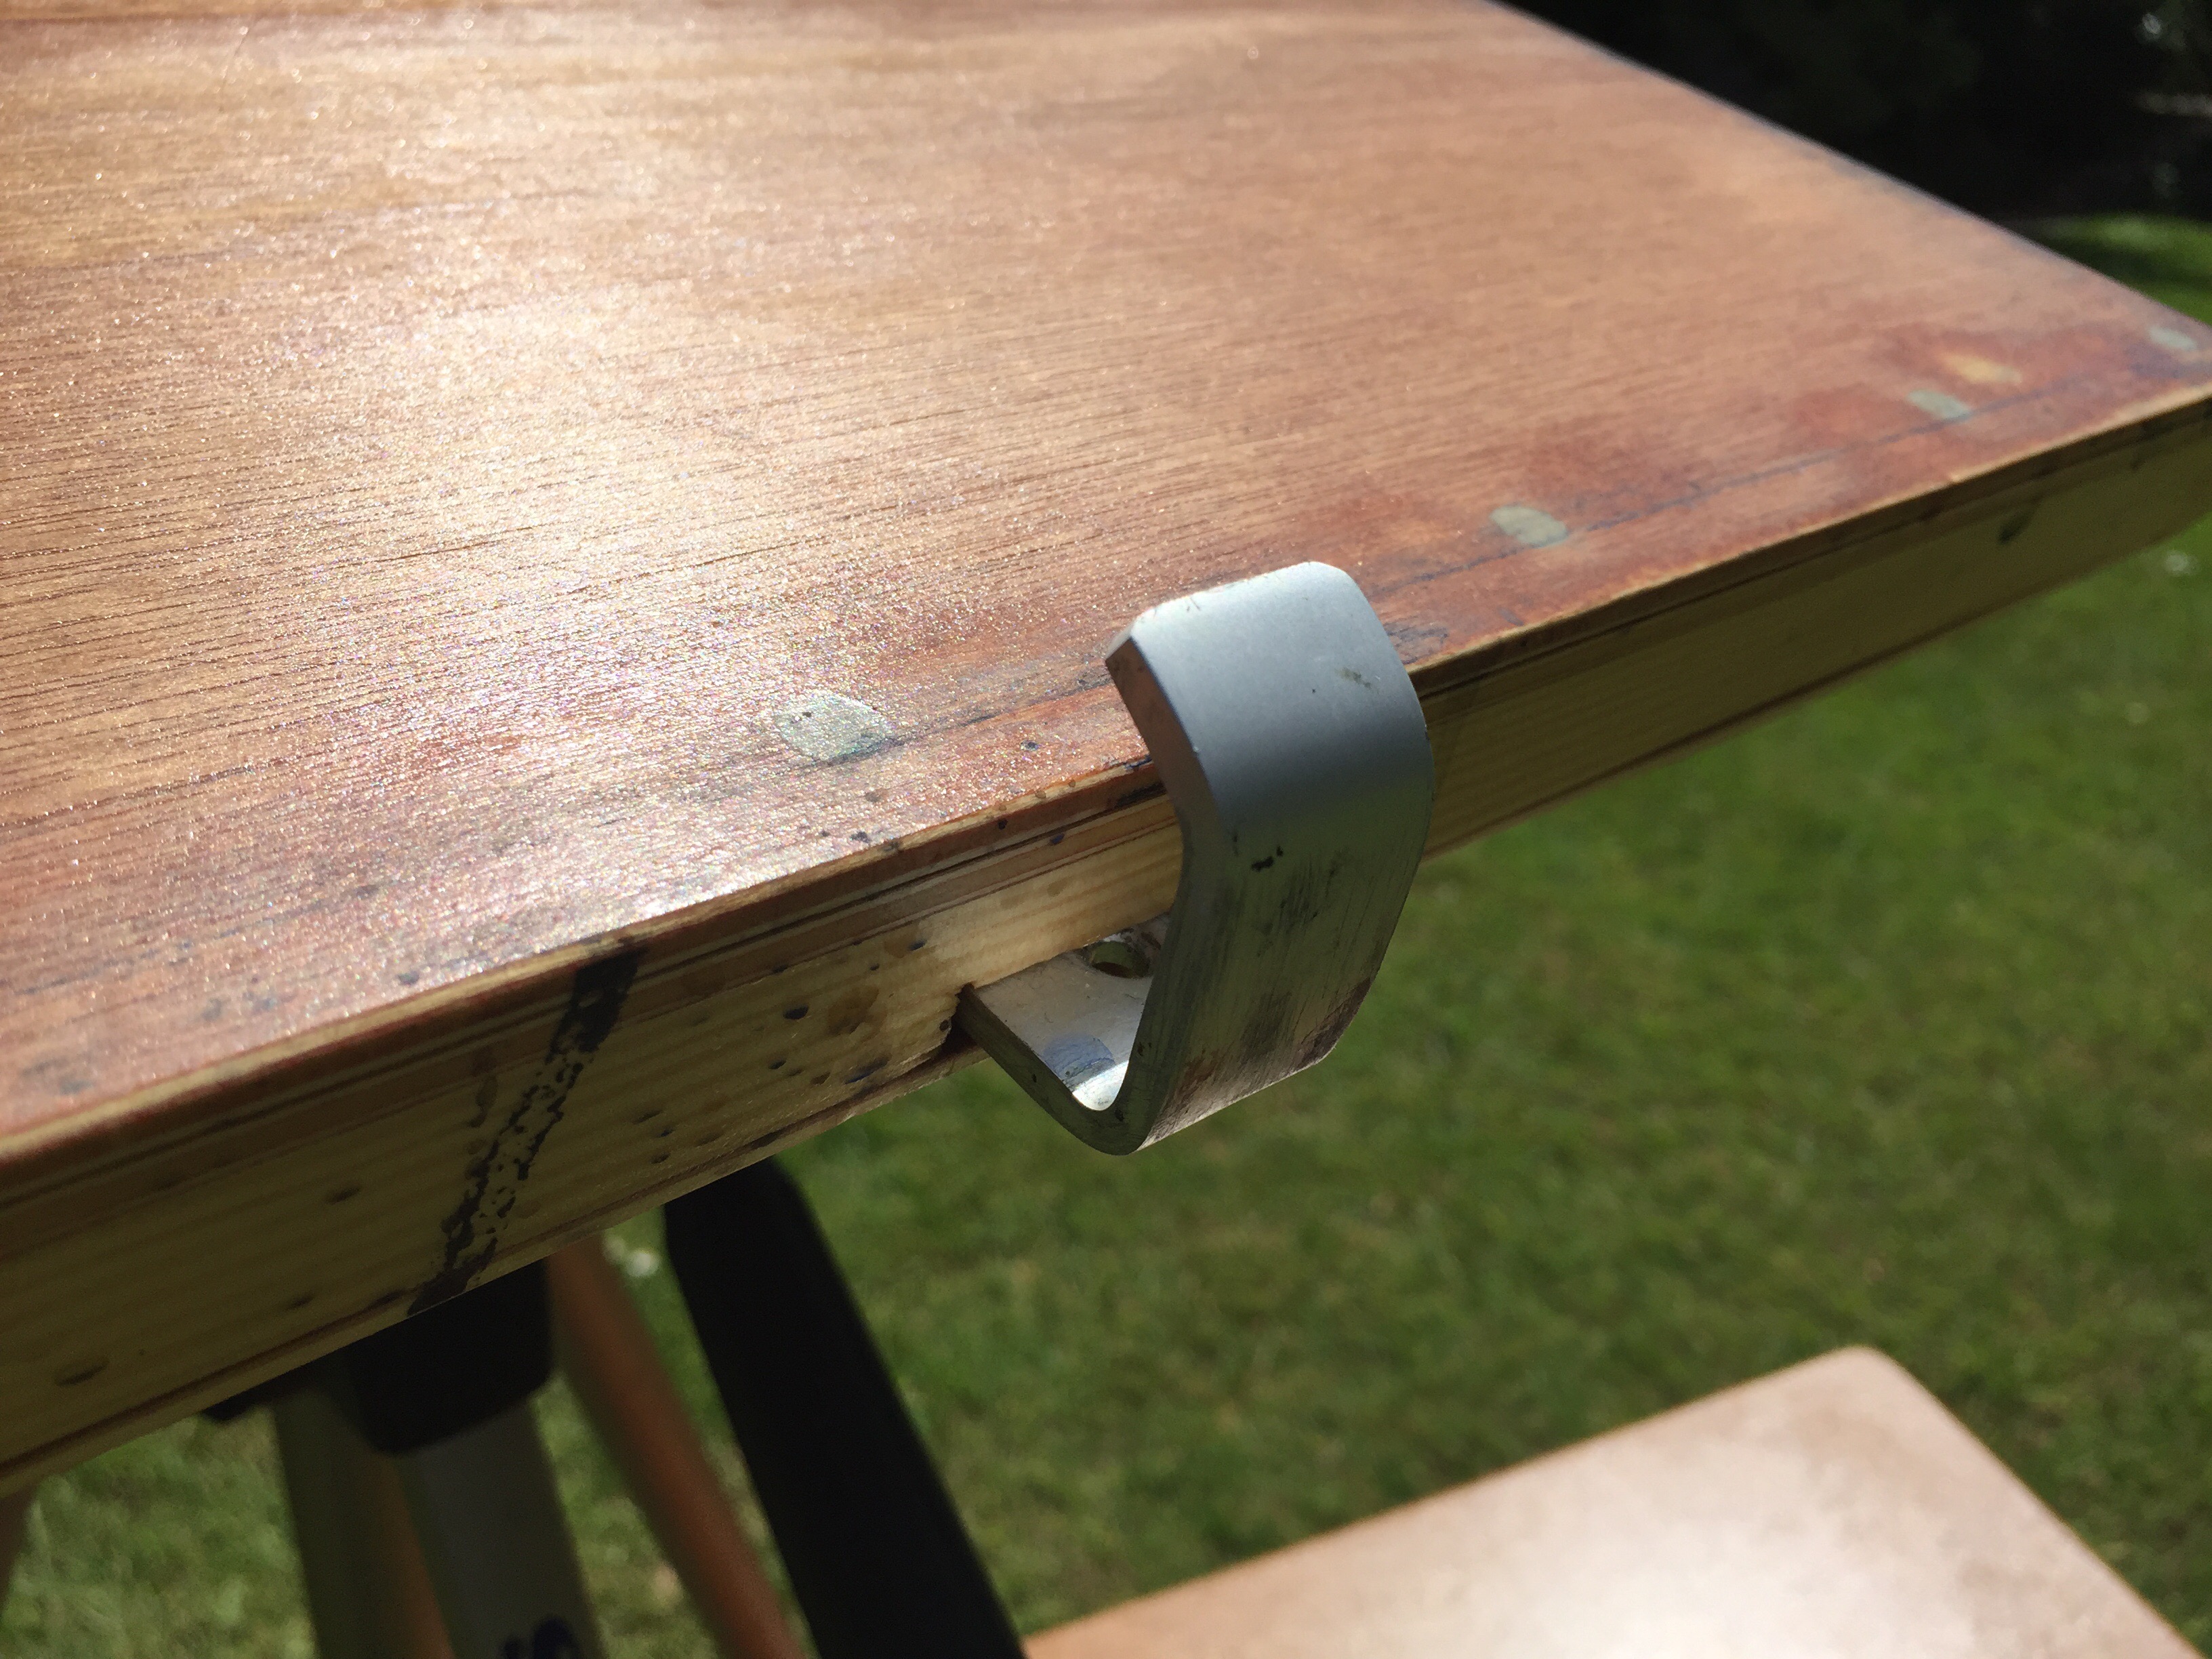
To make this (or something similar) you’ll need:
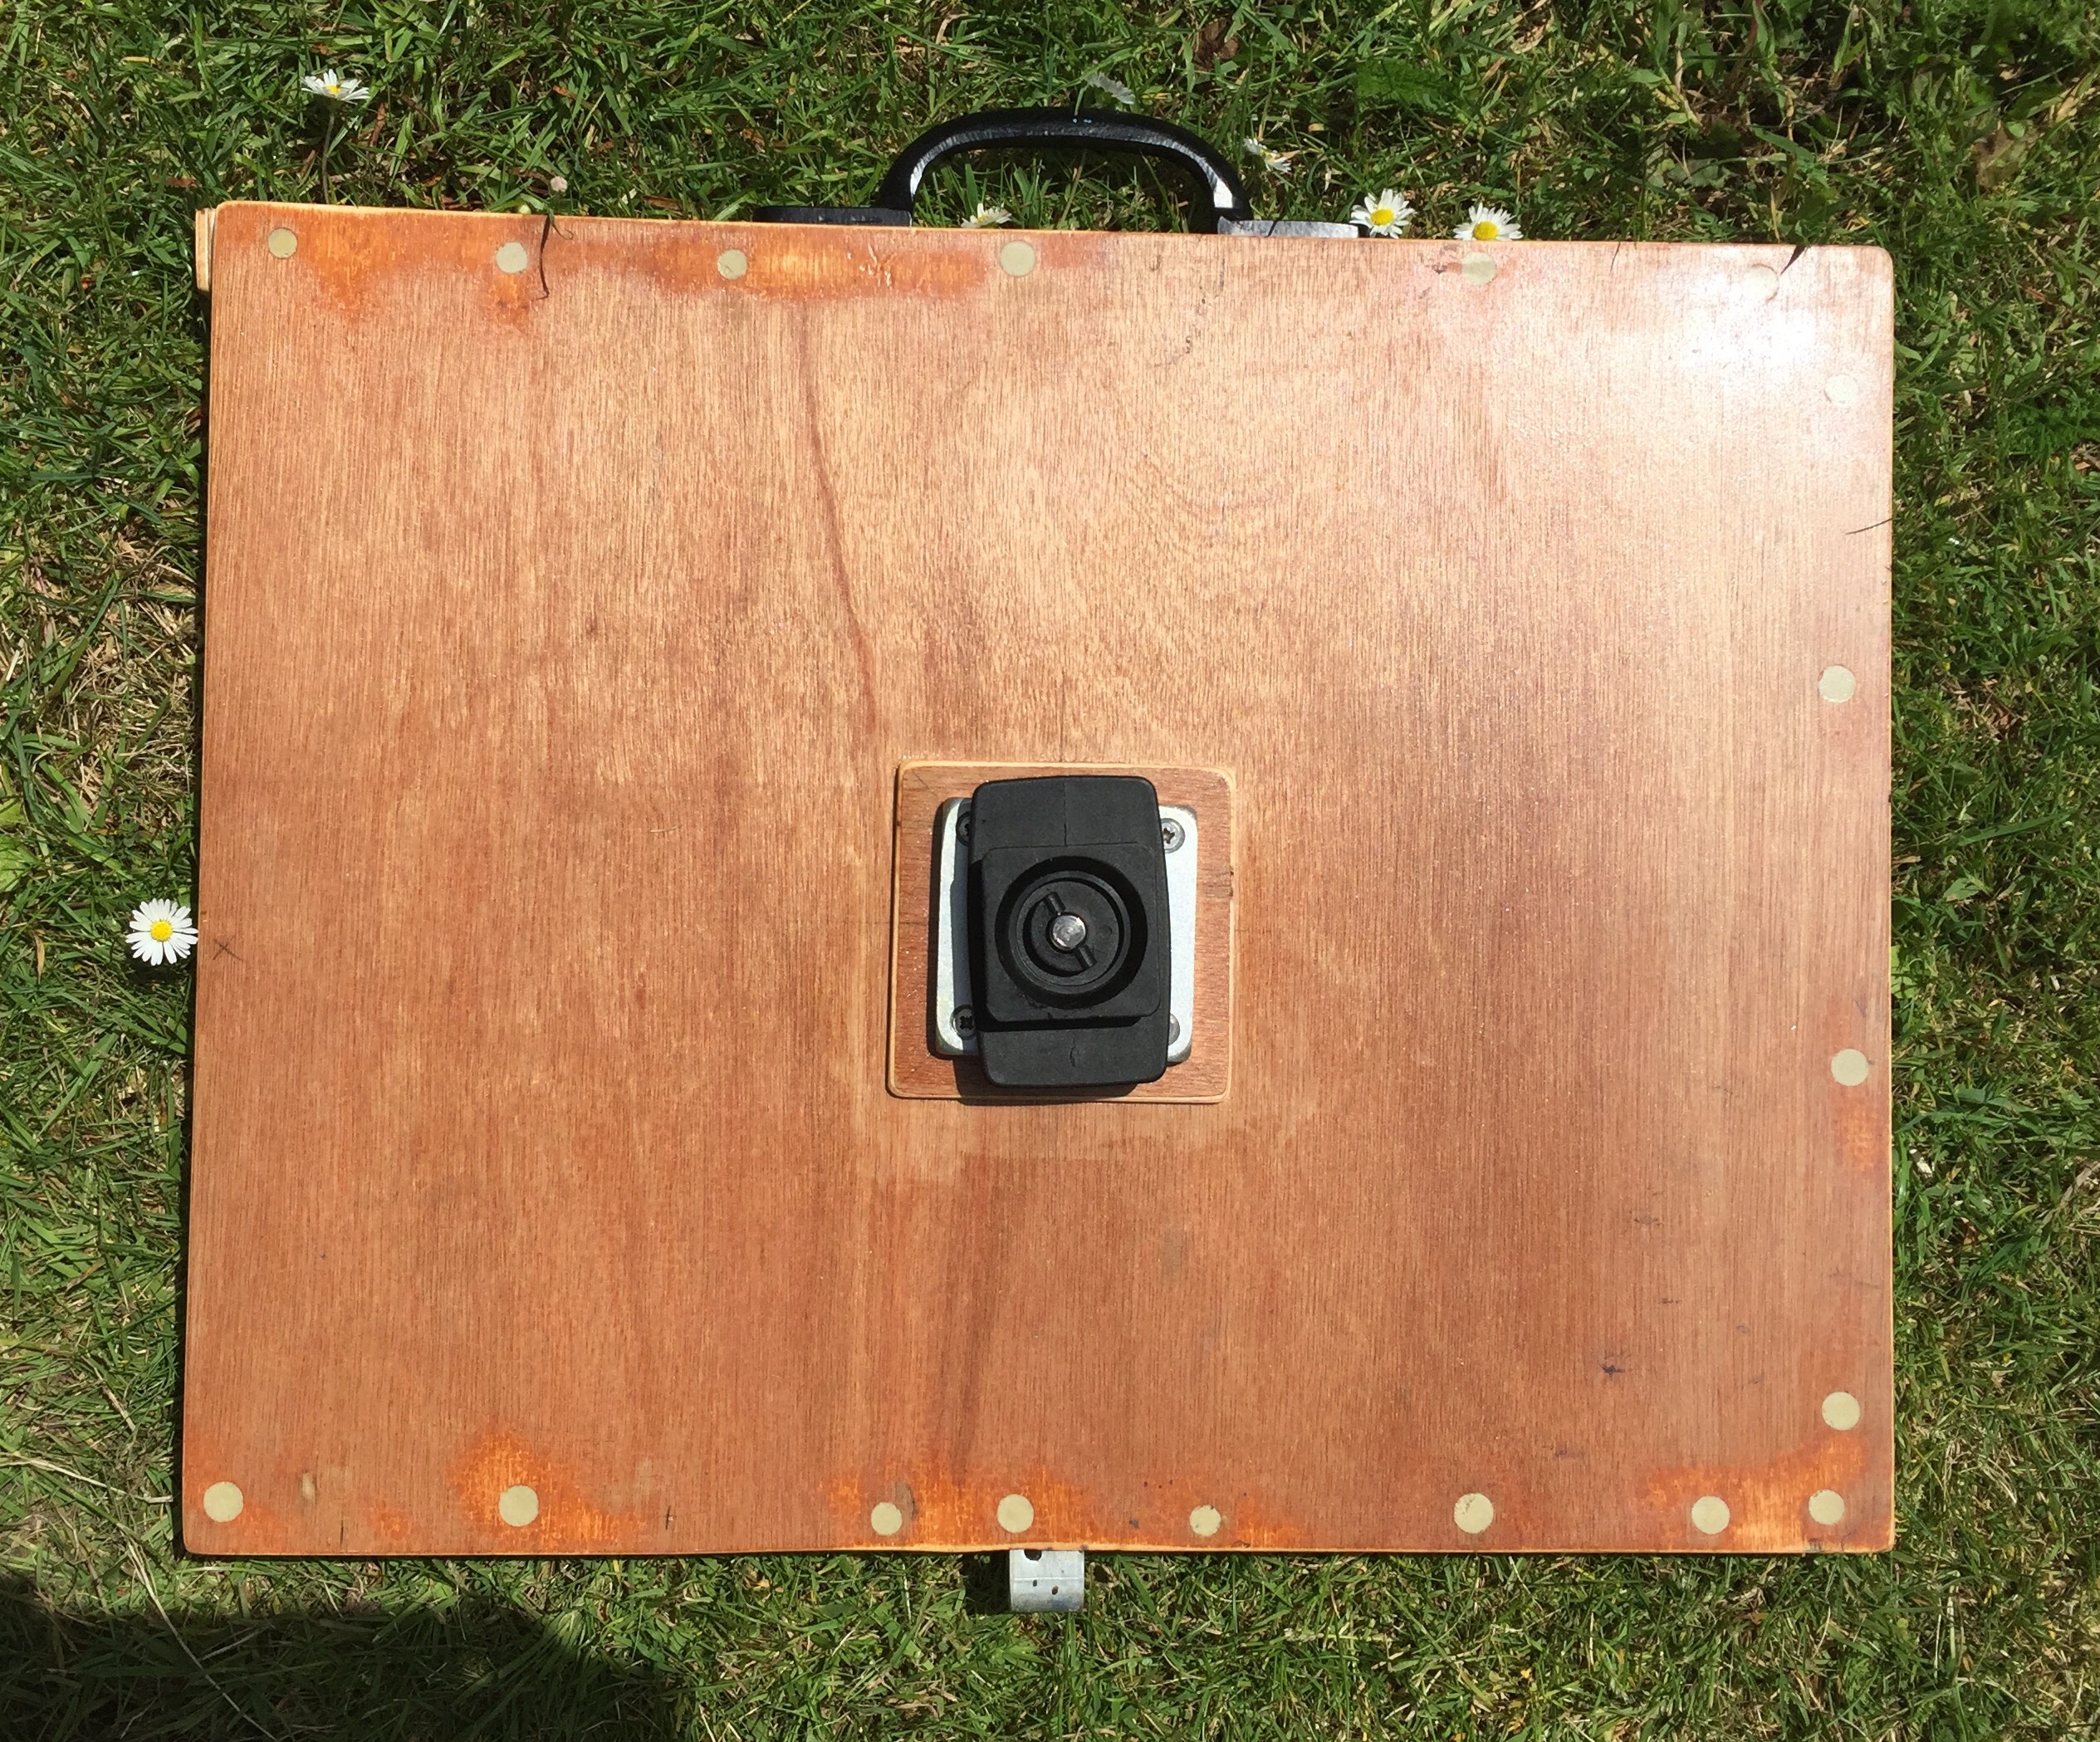
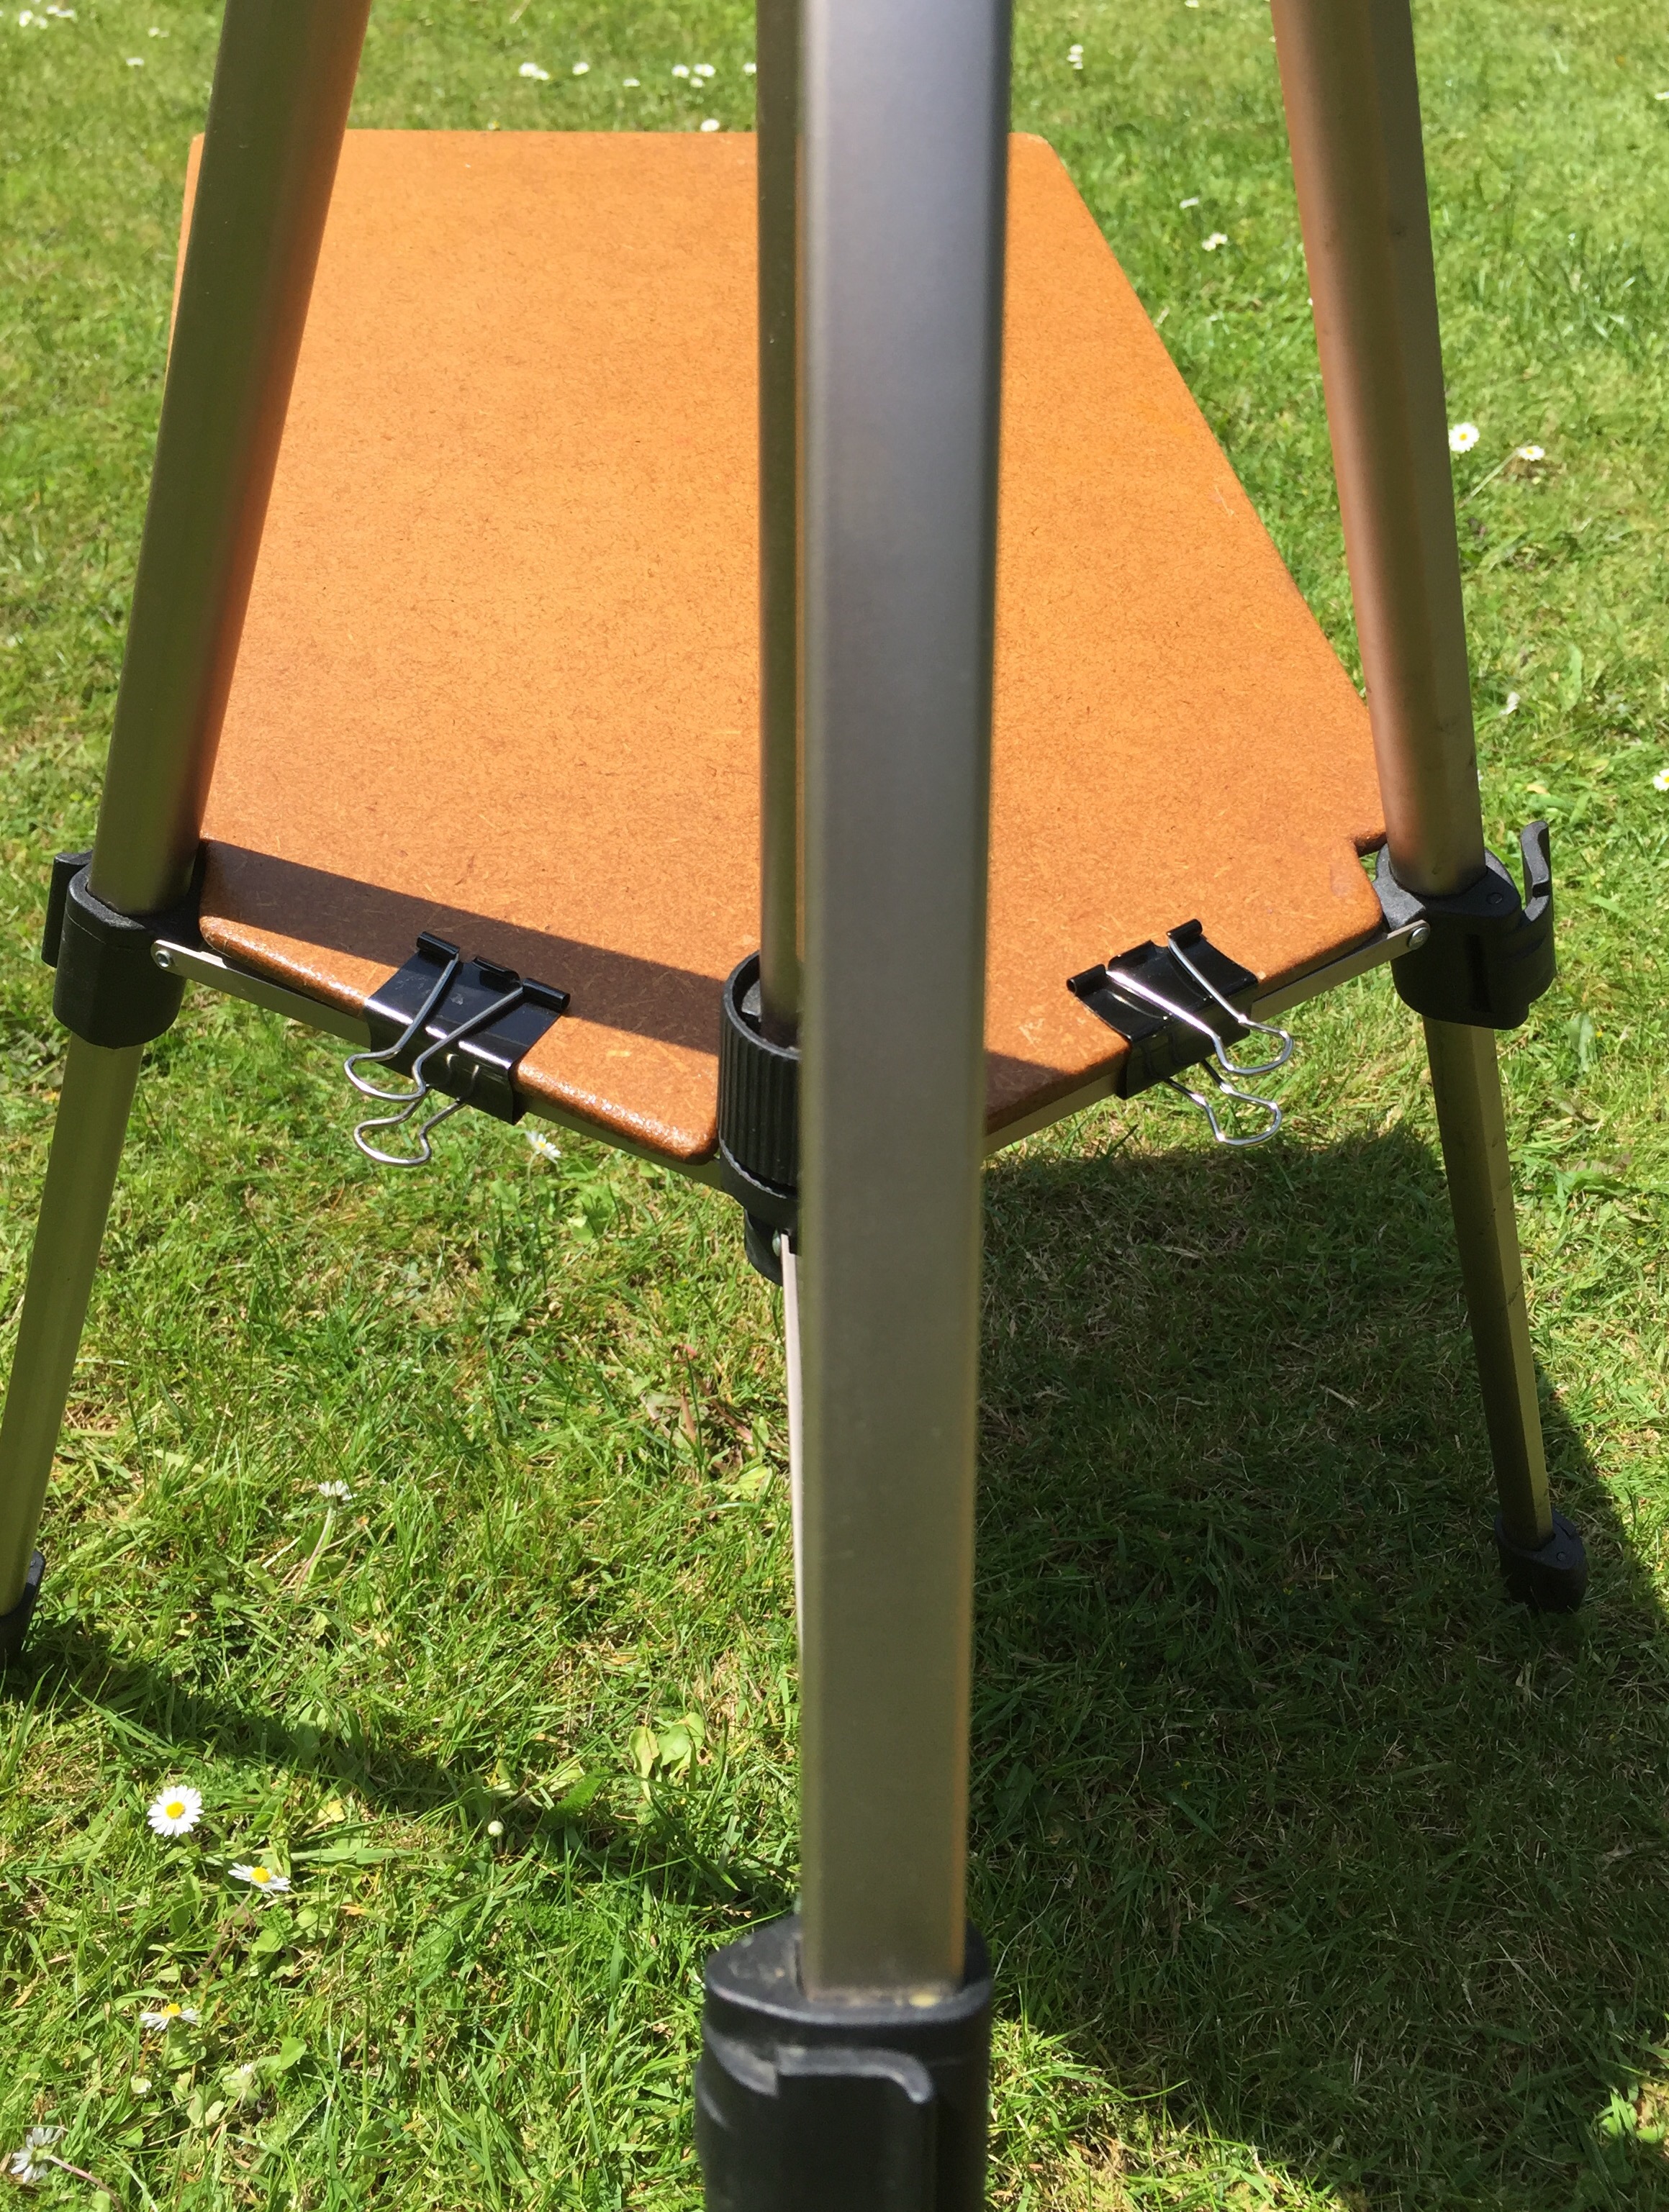
a small sheet of 6mm ply (enough to do 3 pieces approx 425mm 335mm) – (if in doubt I’d err slightly on side of caution and go a fraction larger, only means you’ll have a bit more room for your paper to move around), wood baton (24mm x 15mm baton, about 1110mm long), wood glue/pva, screws, screwdriver, woodfiller, sanding paper, Ken Bromley’s camera tripod mount, Danish oil or similar, some patience, and a healthy number of expletives for when any of it goes wrong.
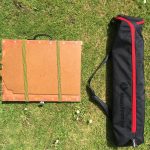
Just as a reminder, this board carries quarter imperial paper. I used a double layer of ply on the top side of the board for strength, but this could have been overkill, you could probably get by with only a single thickness. For the ultra weight conscious, you could also get by with many fewer screws. And a different handle… it all adds up!

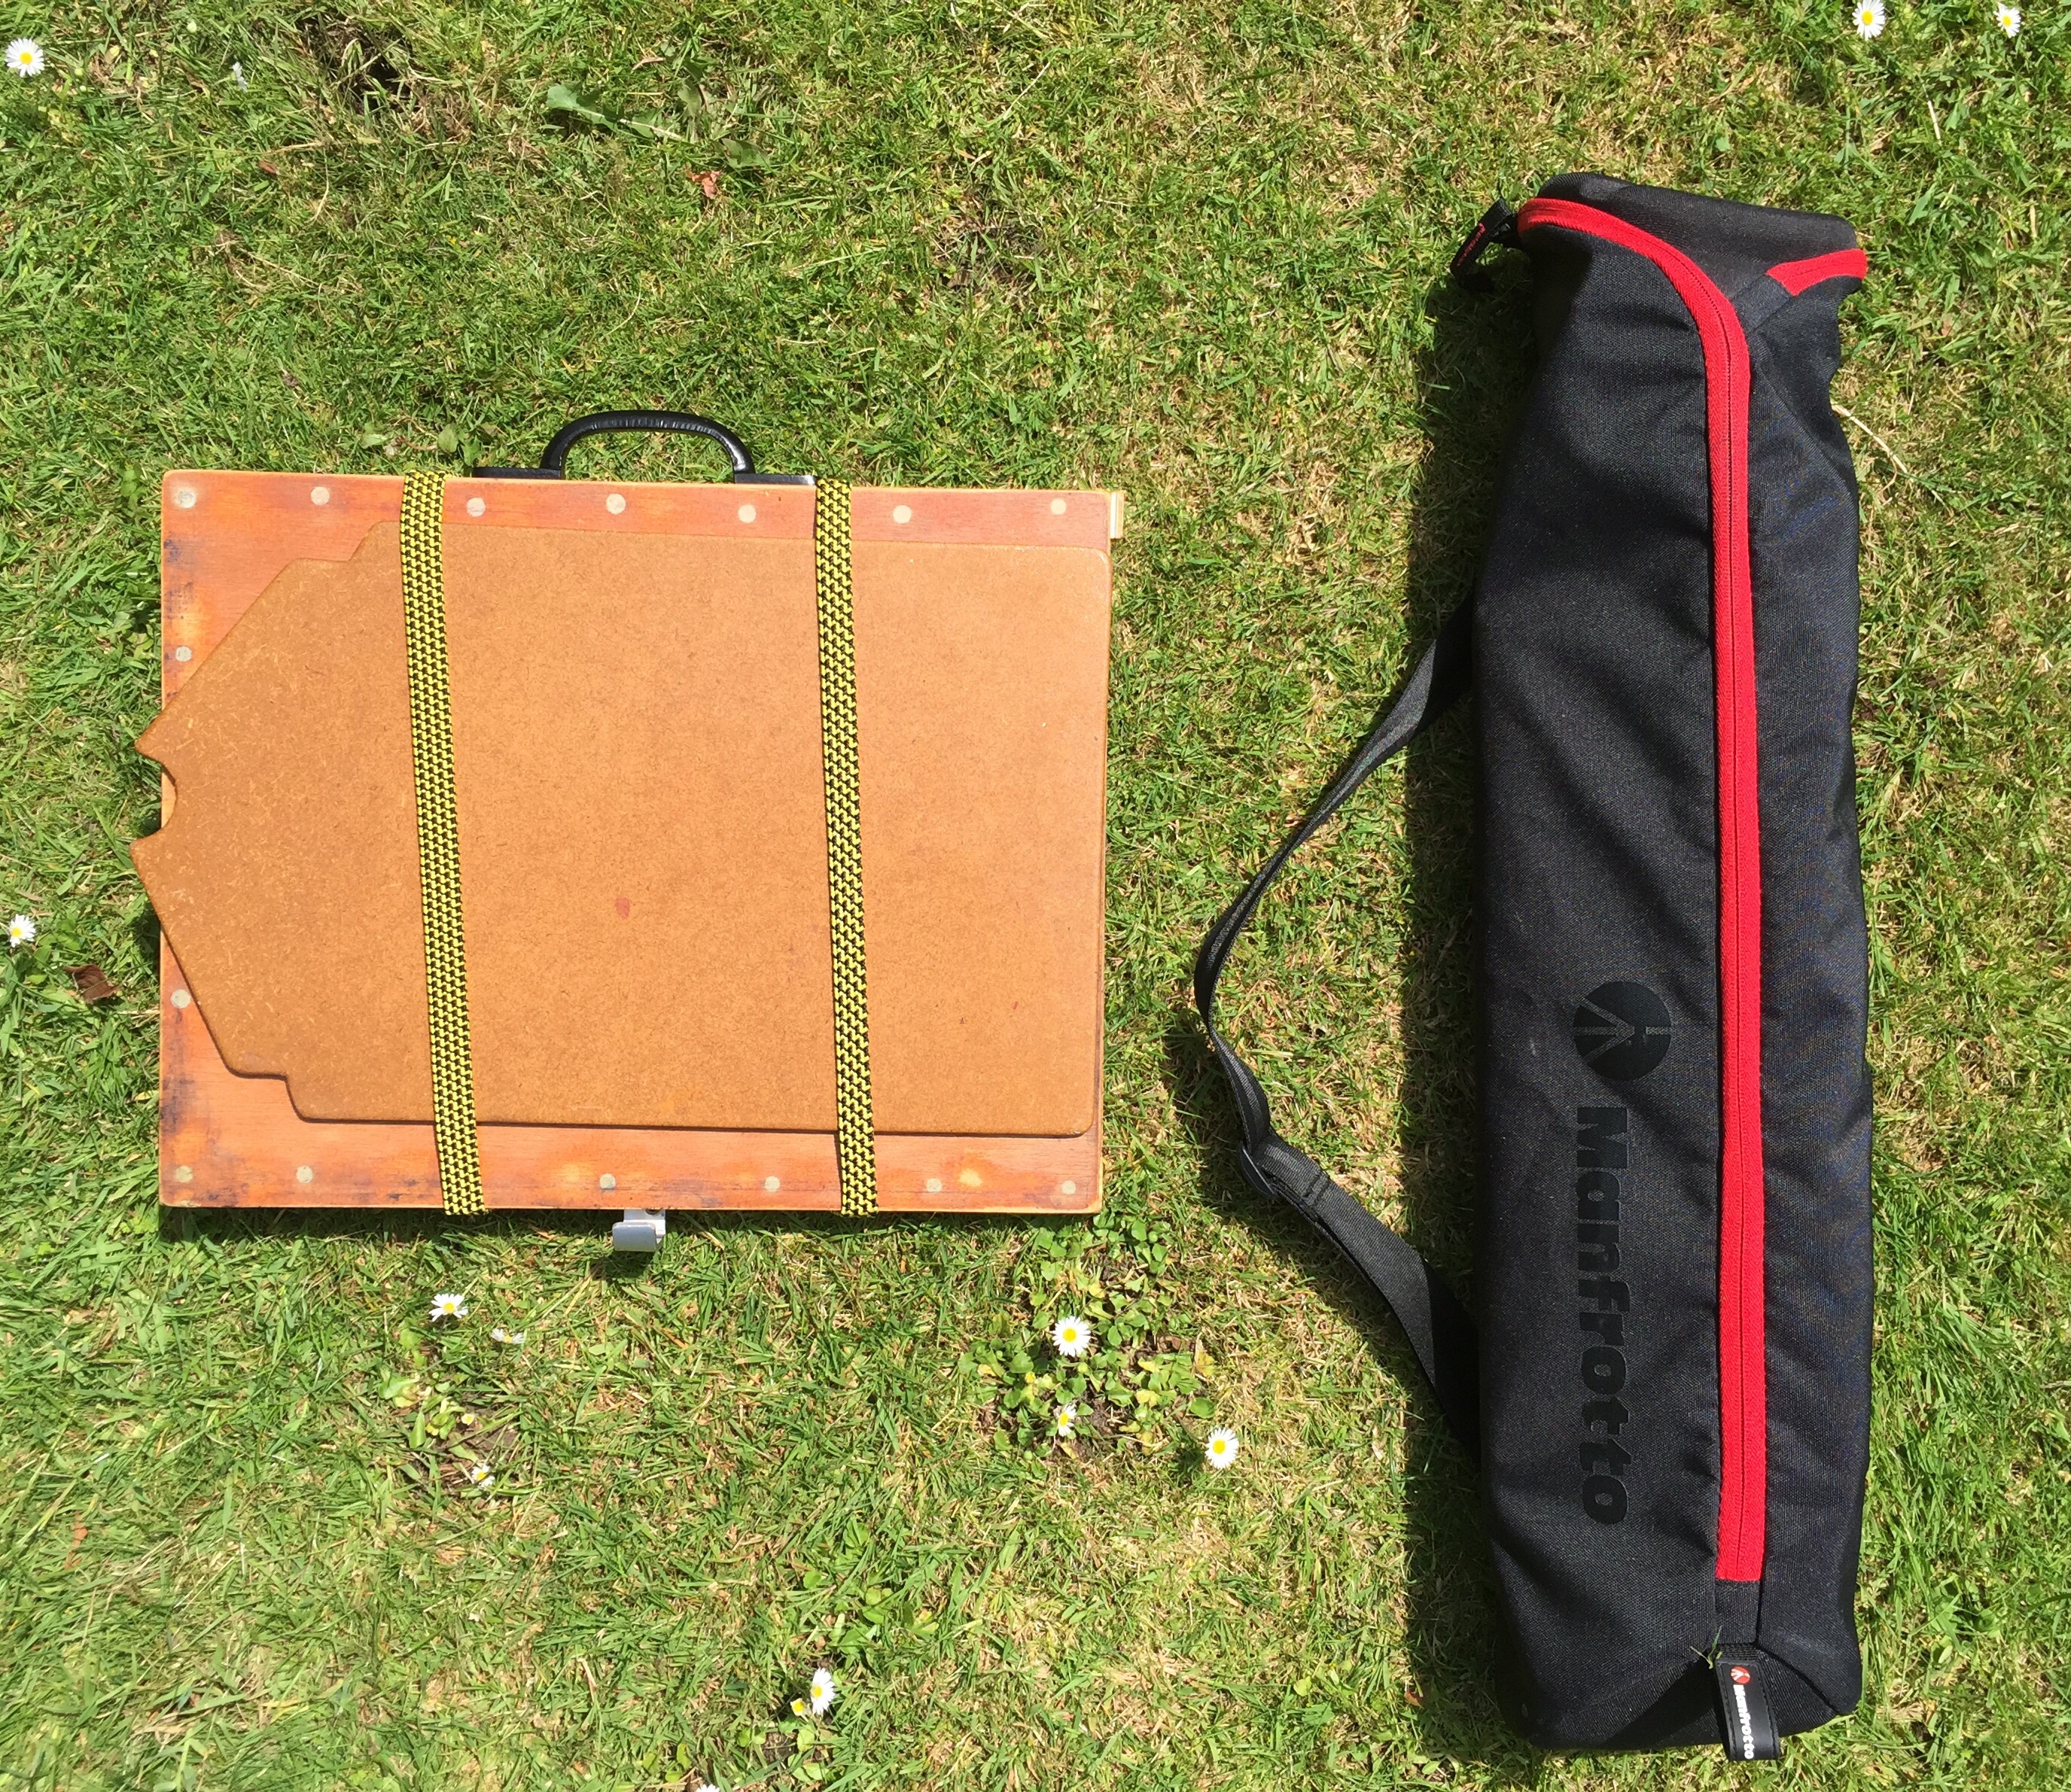
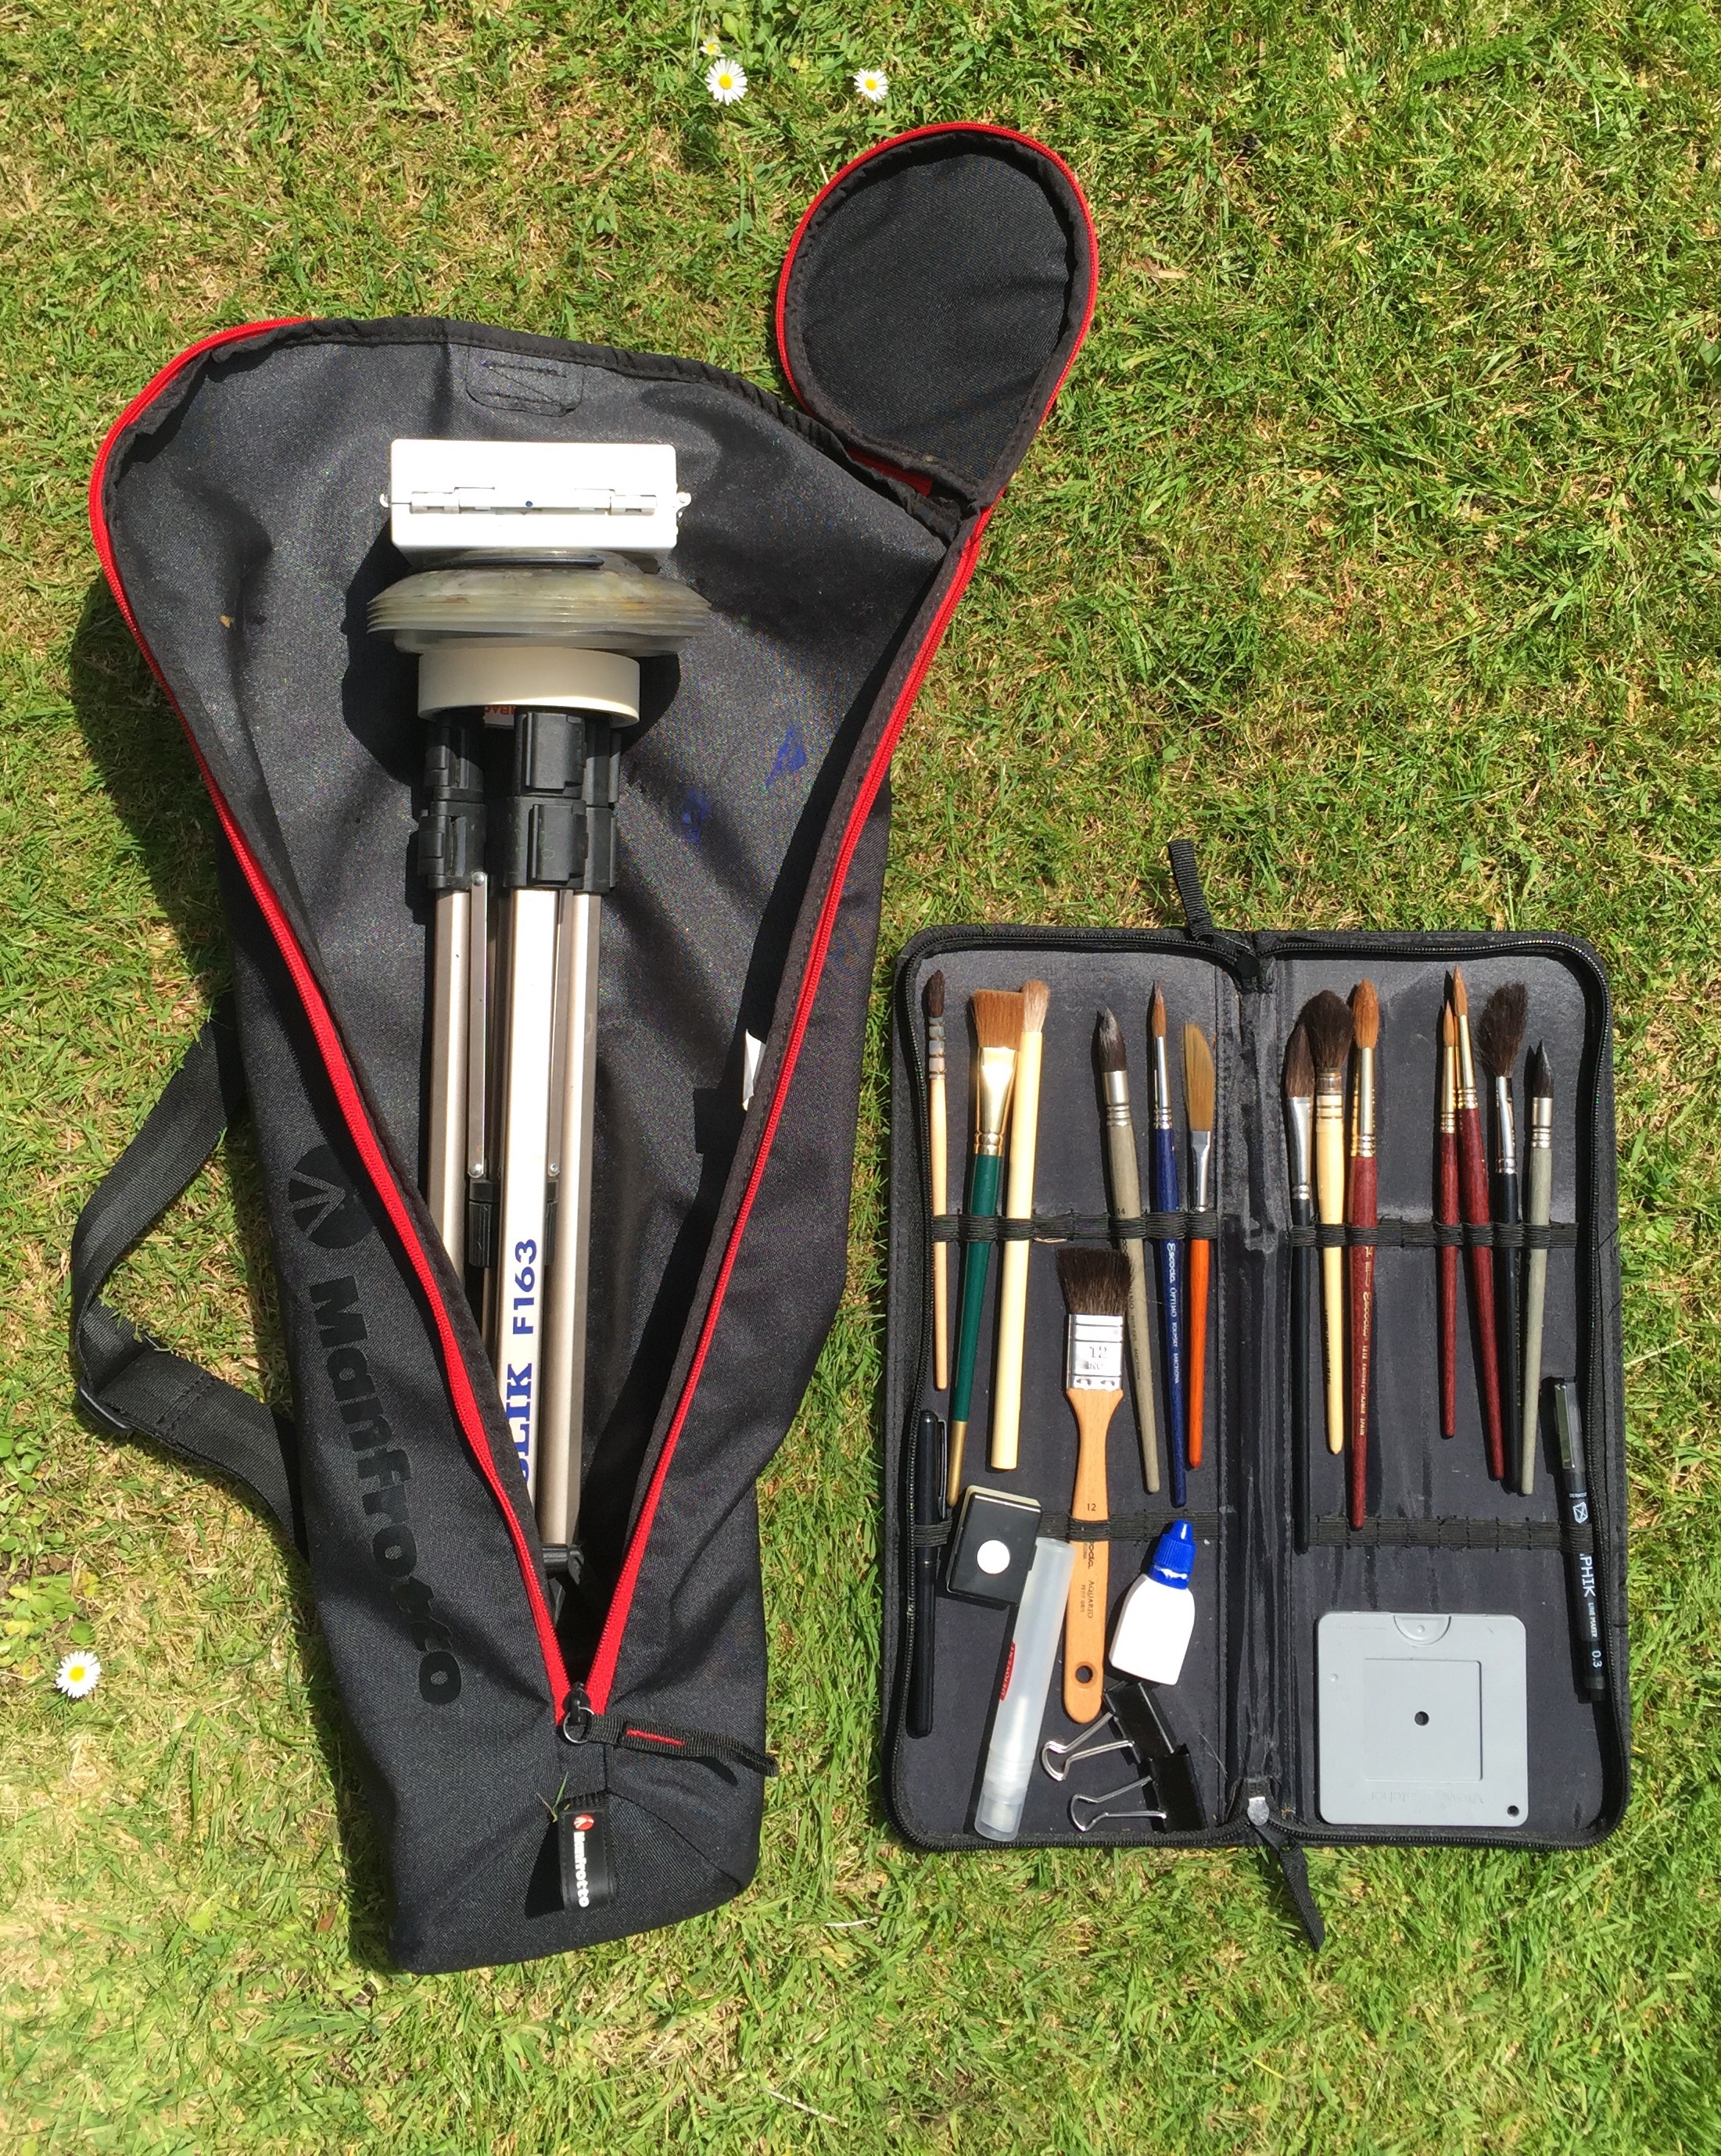
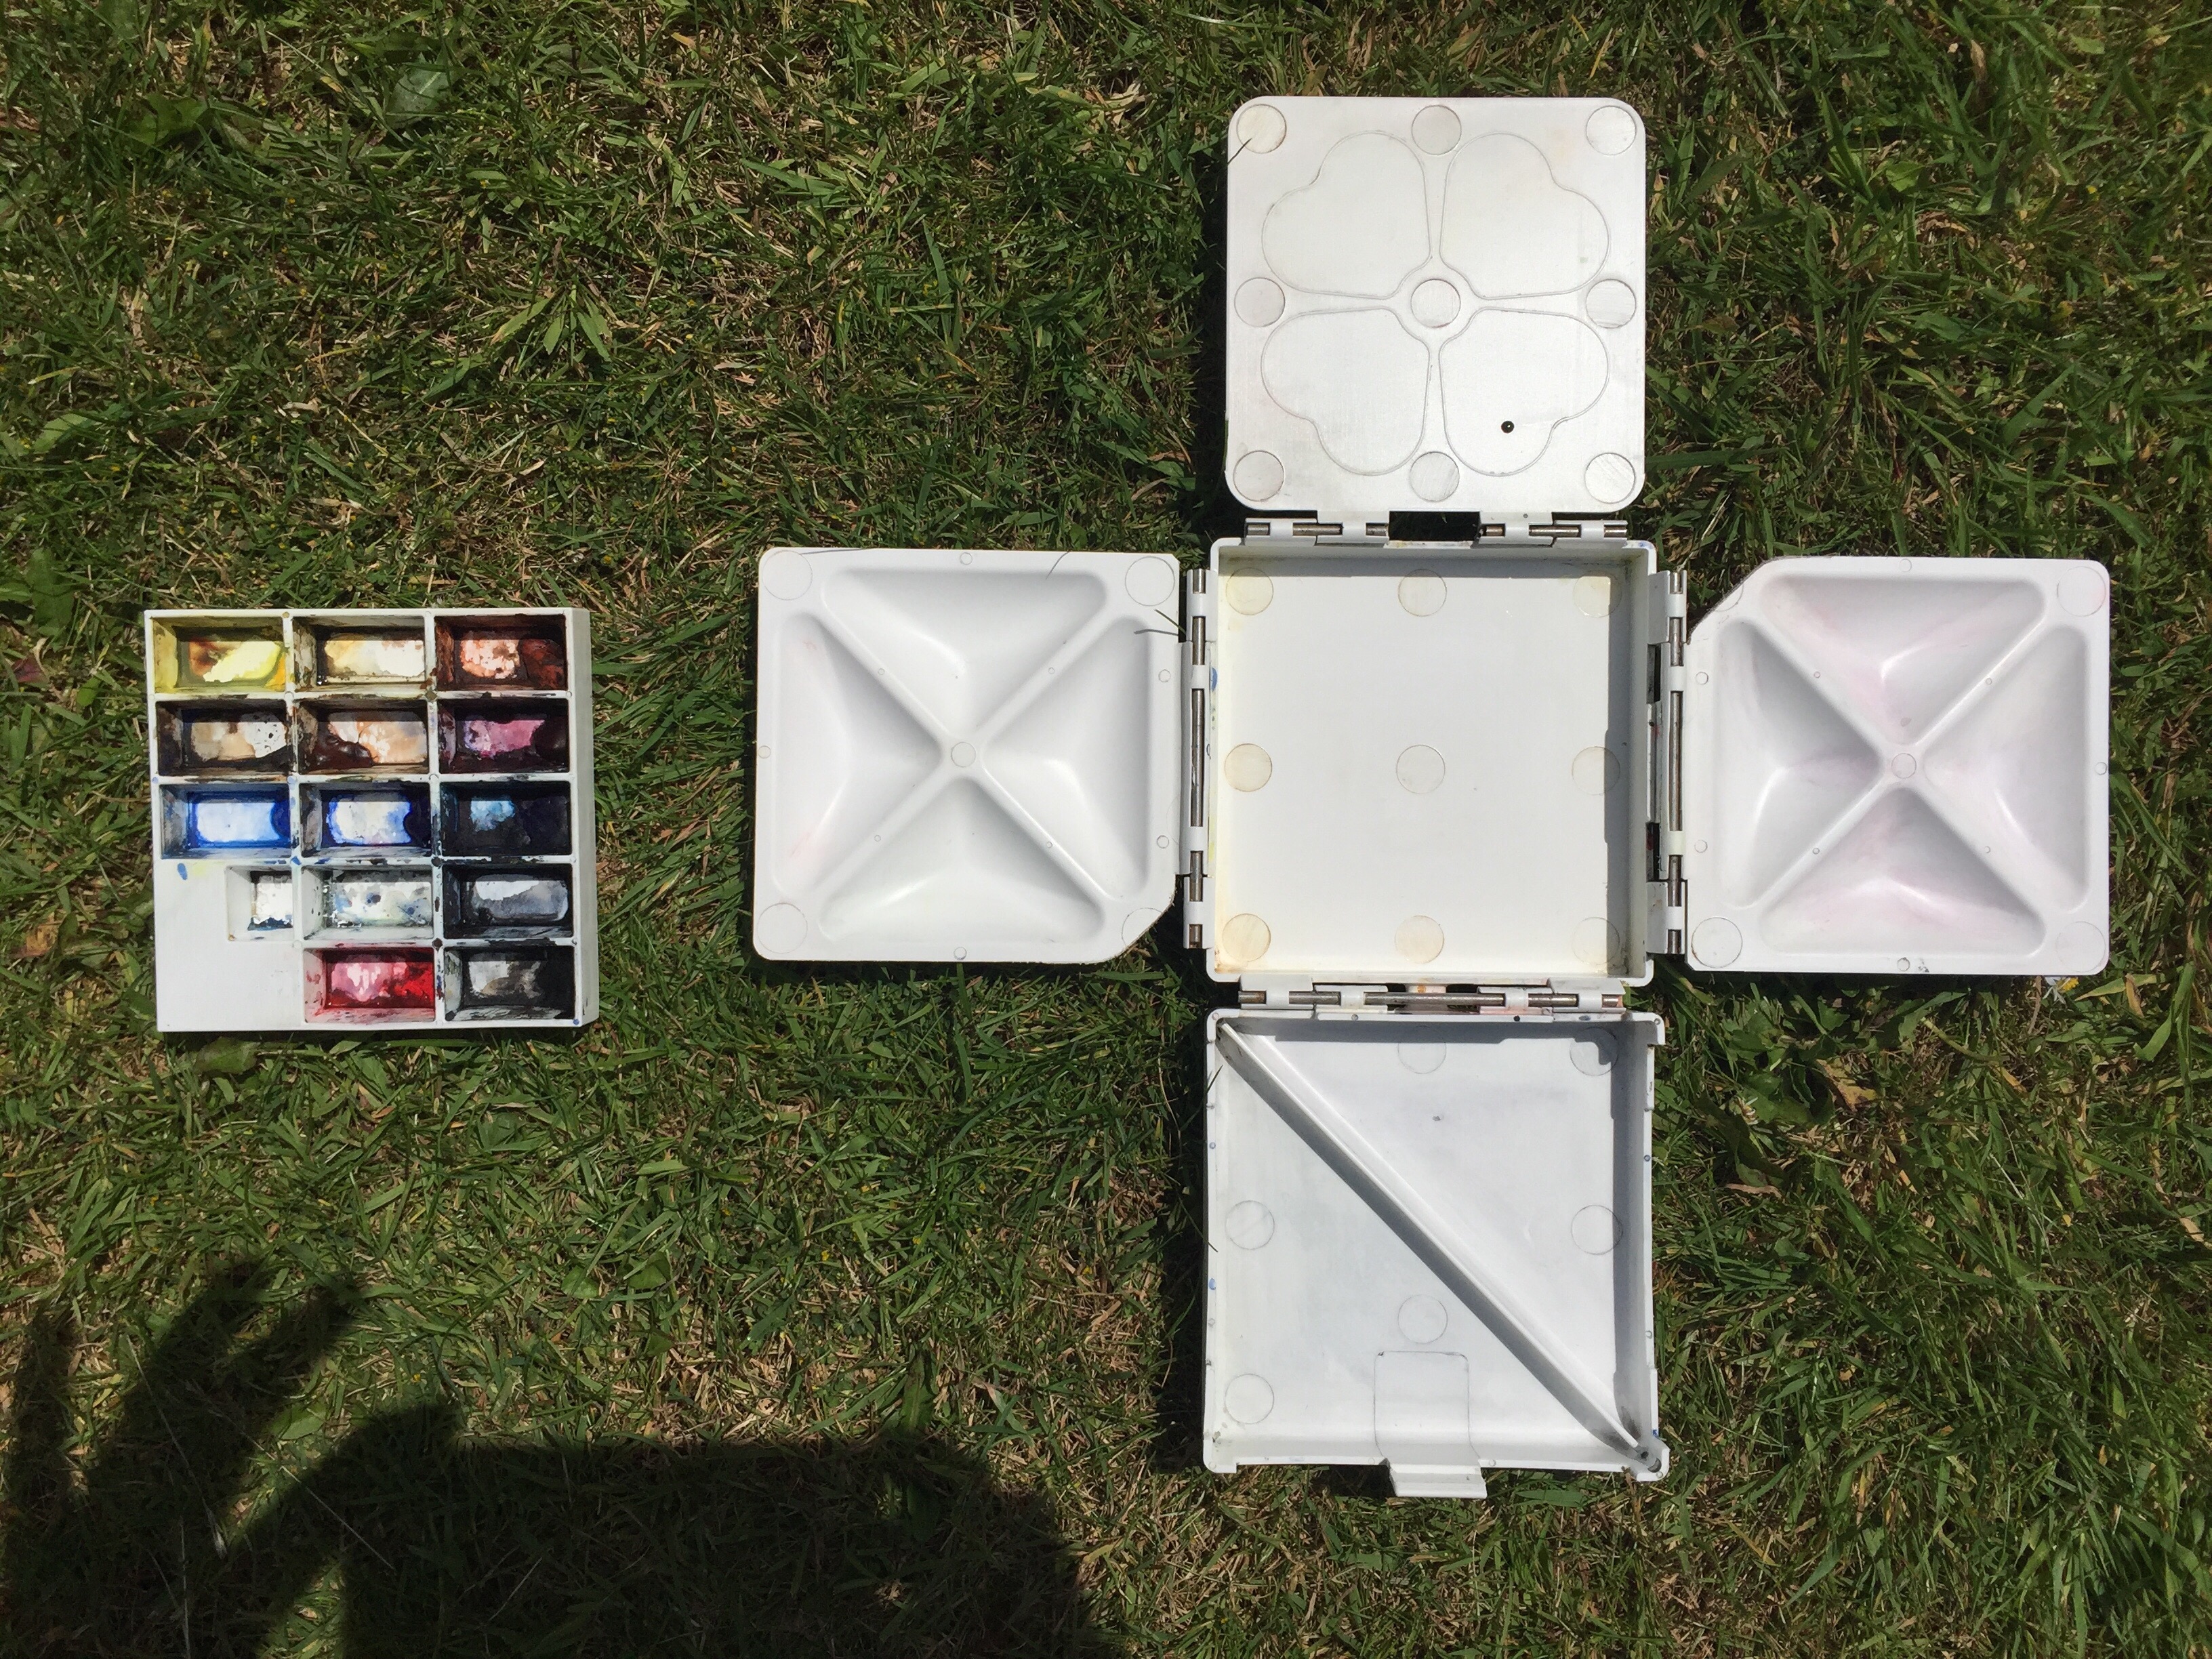
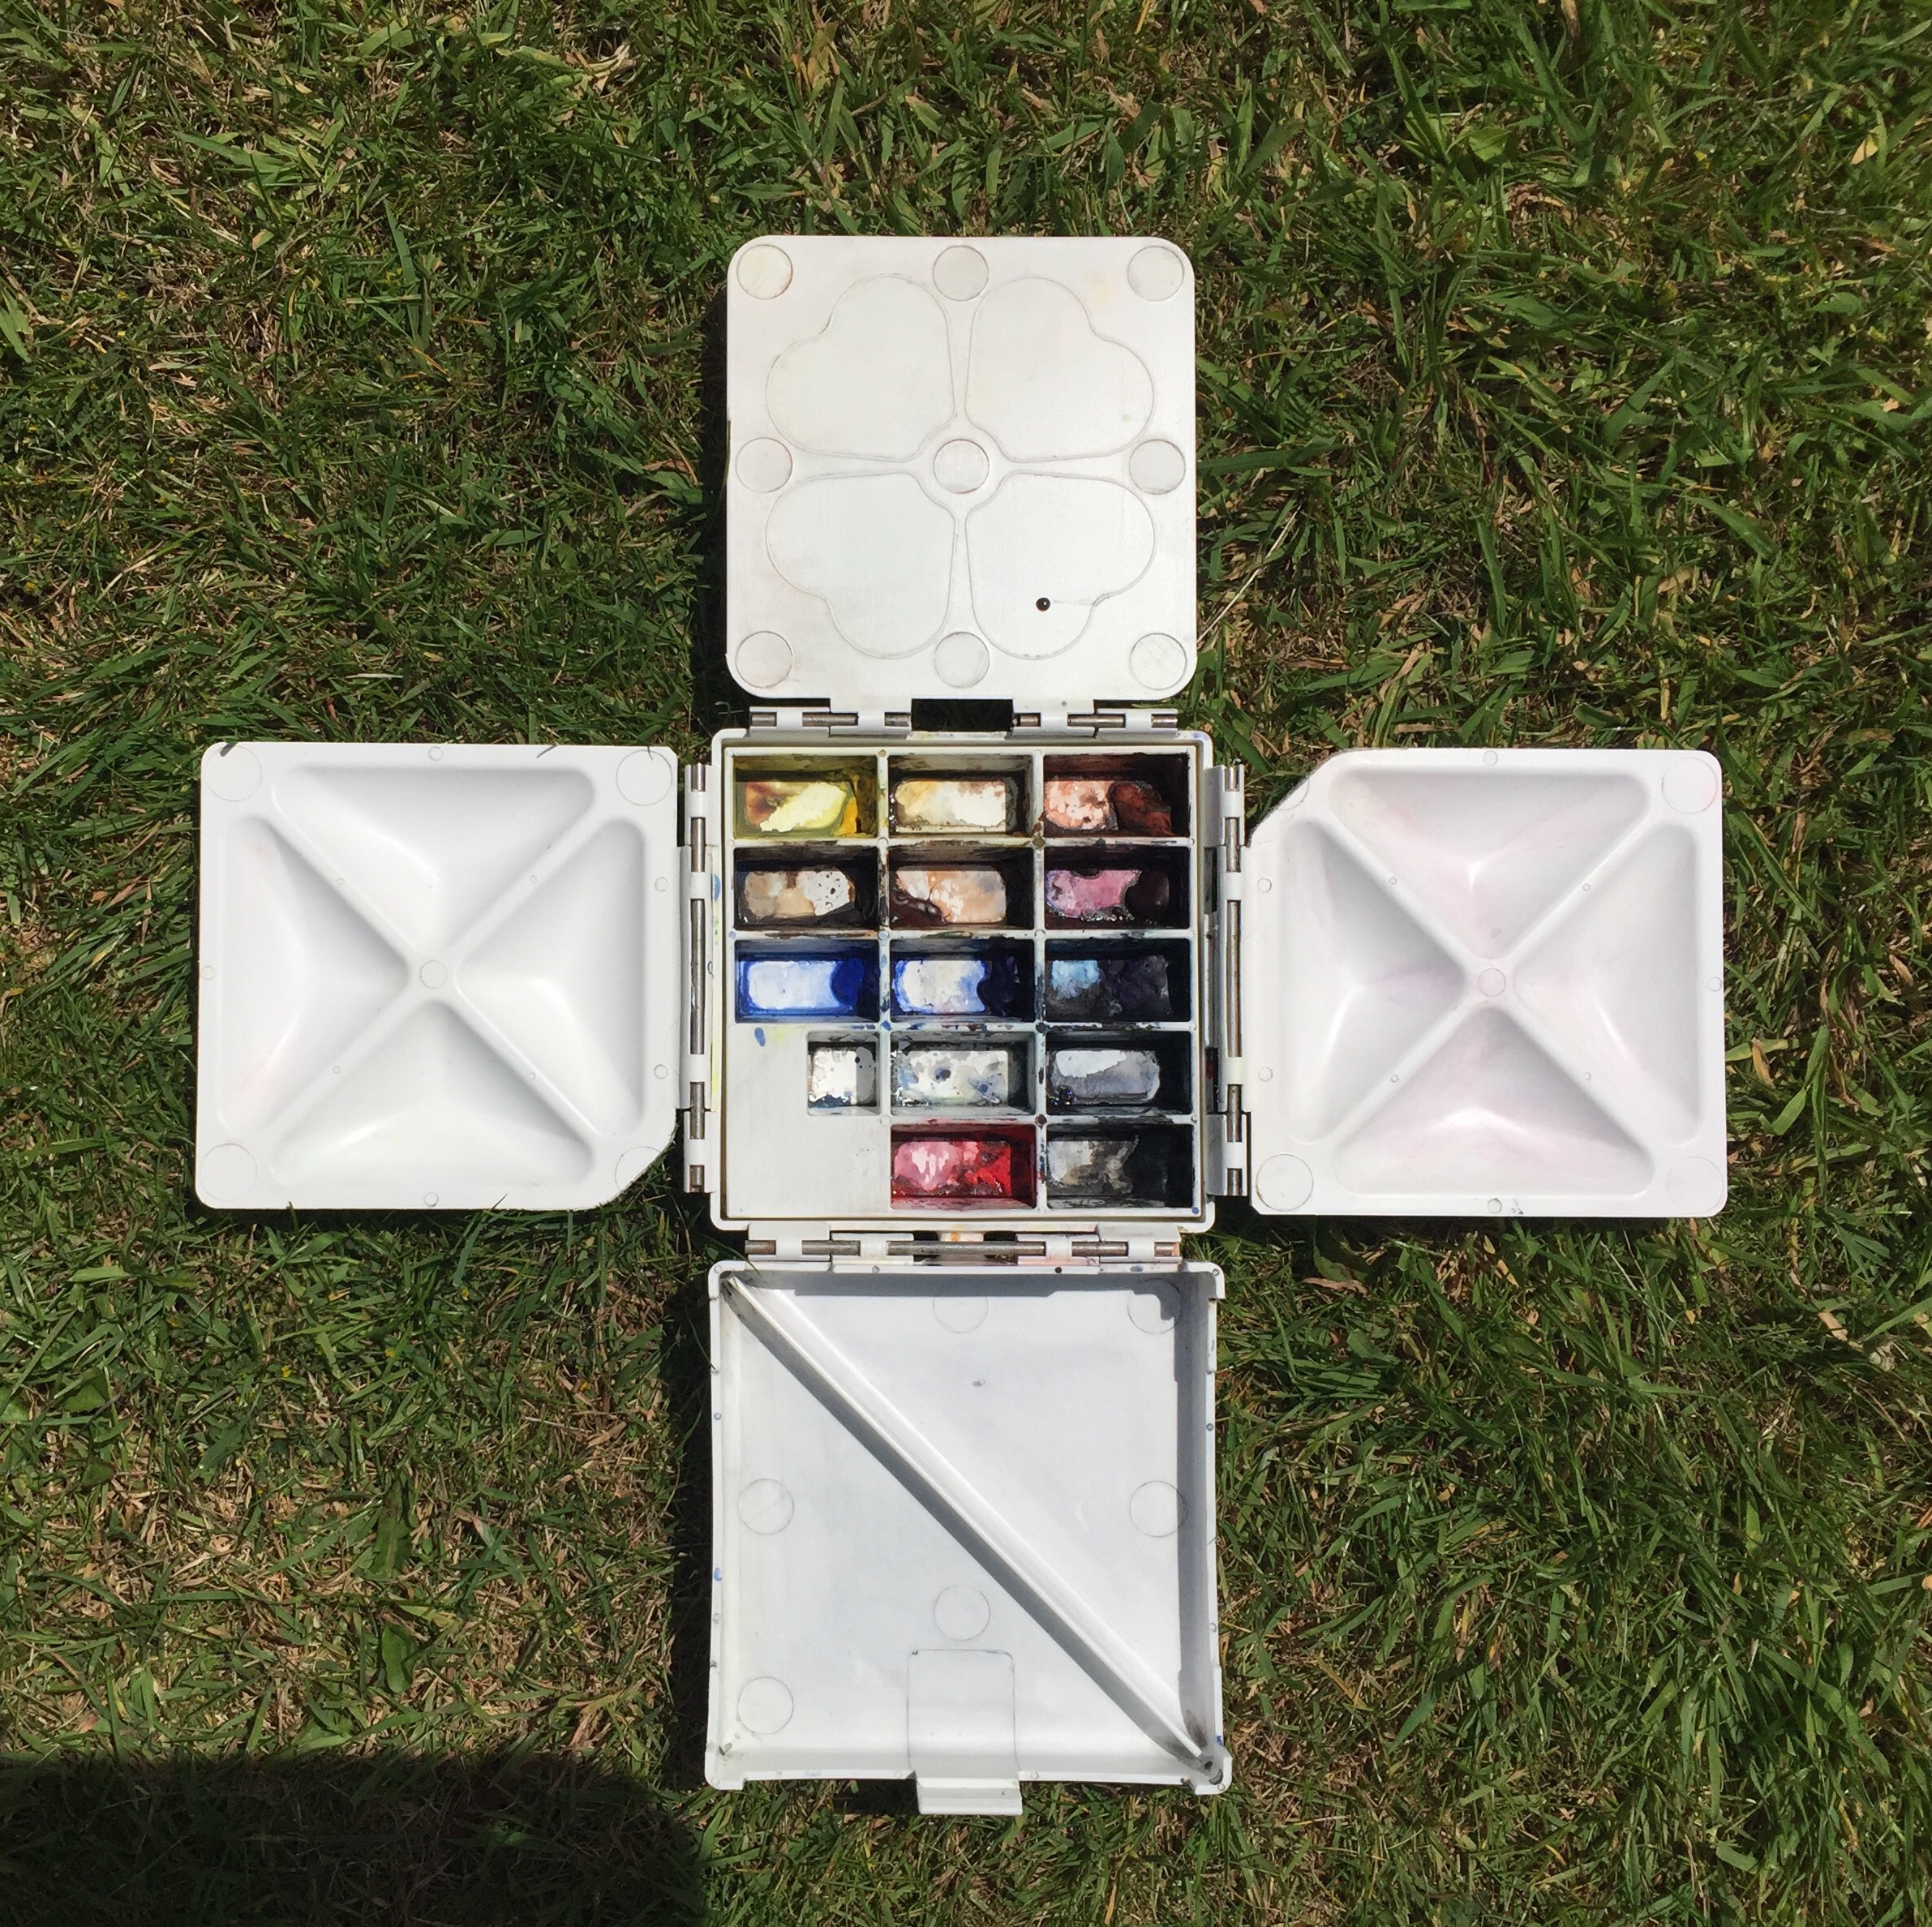
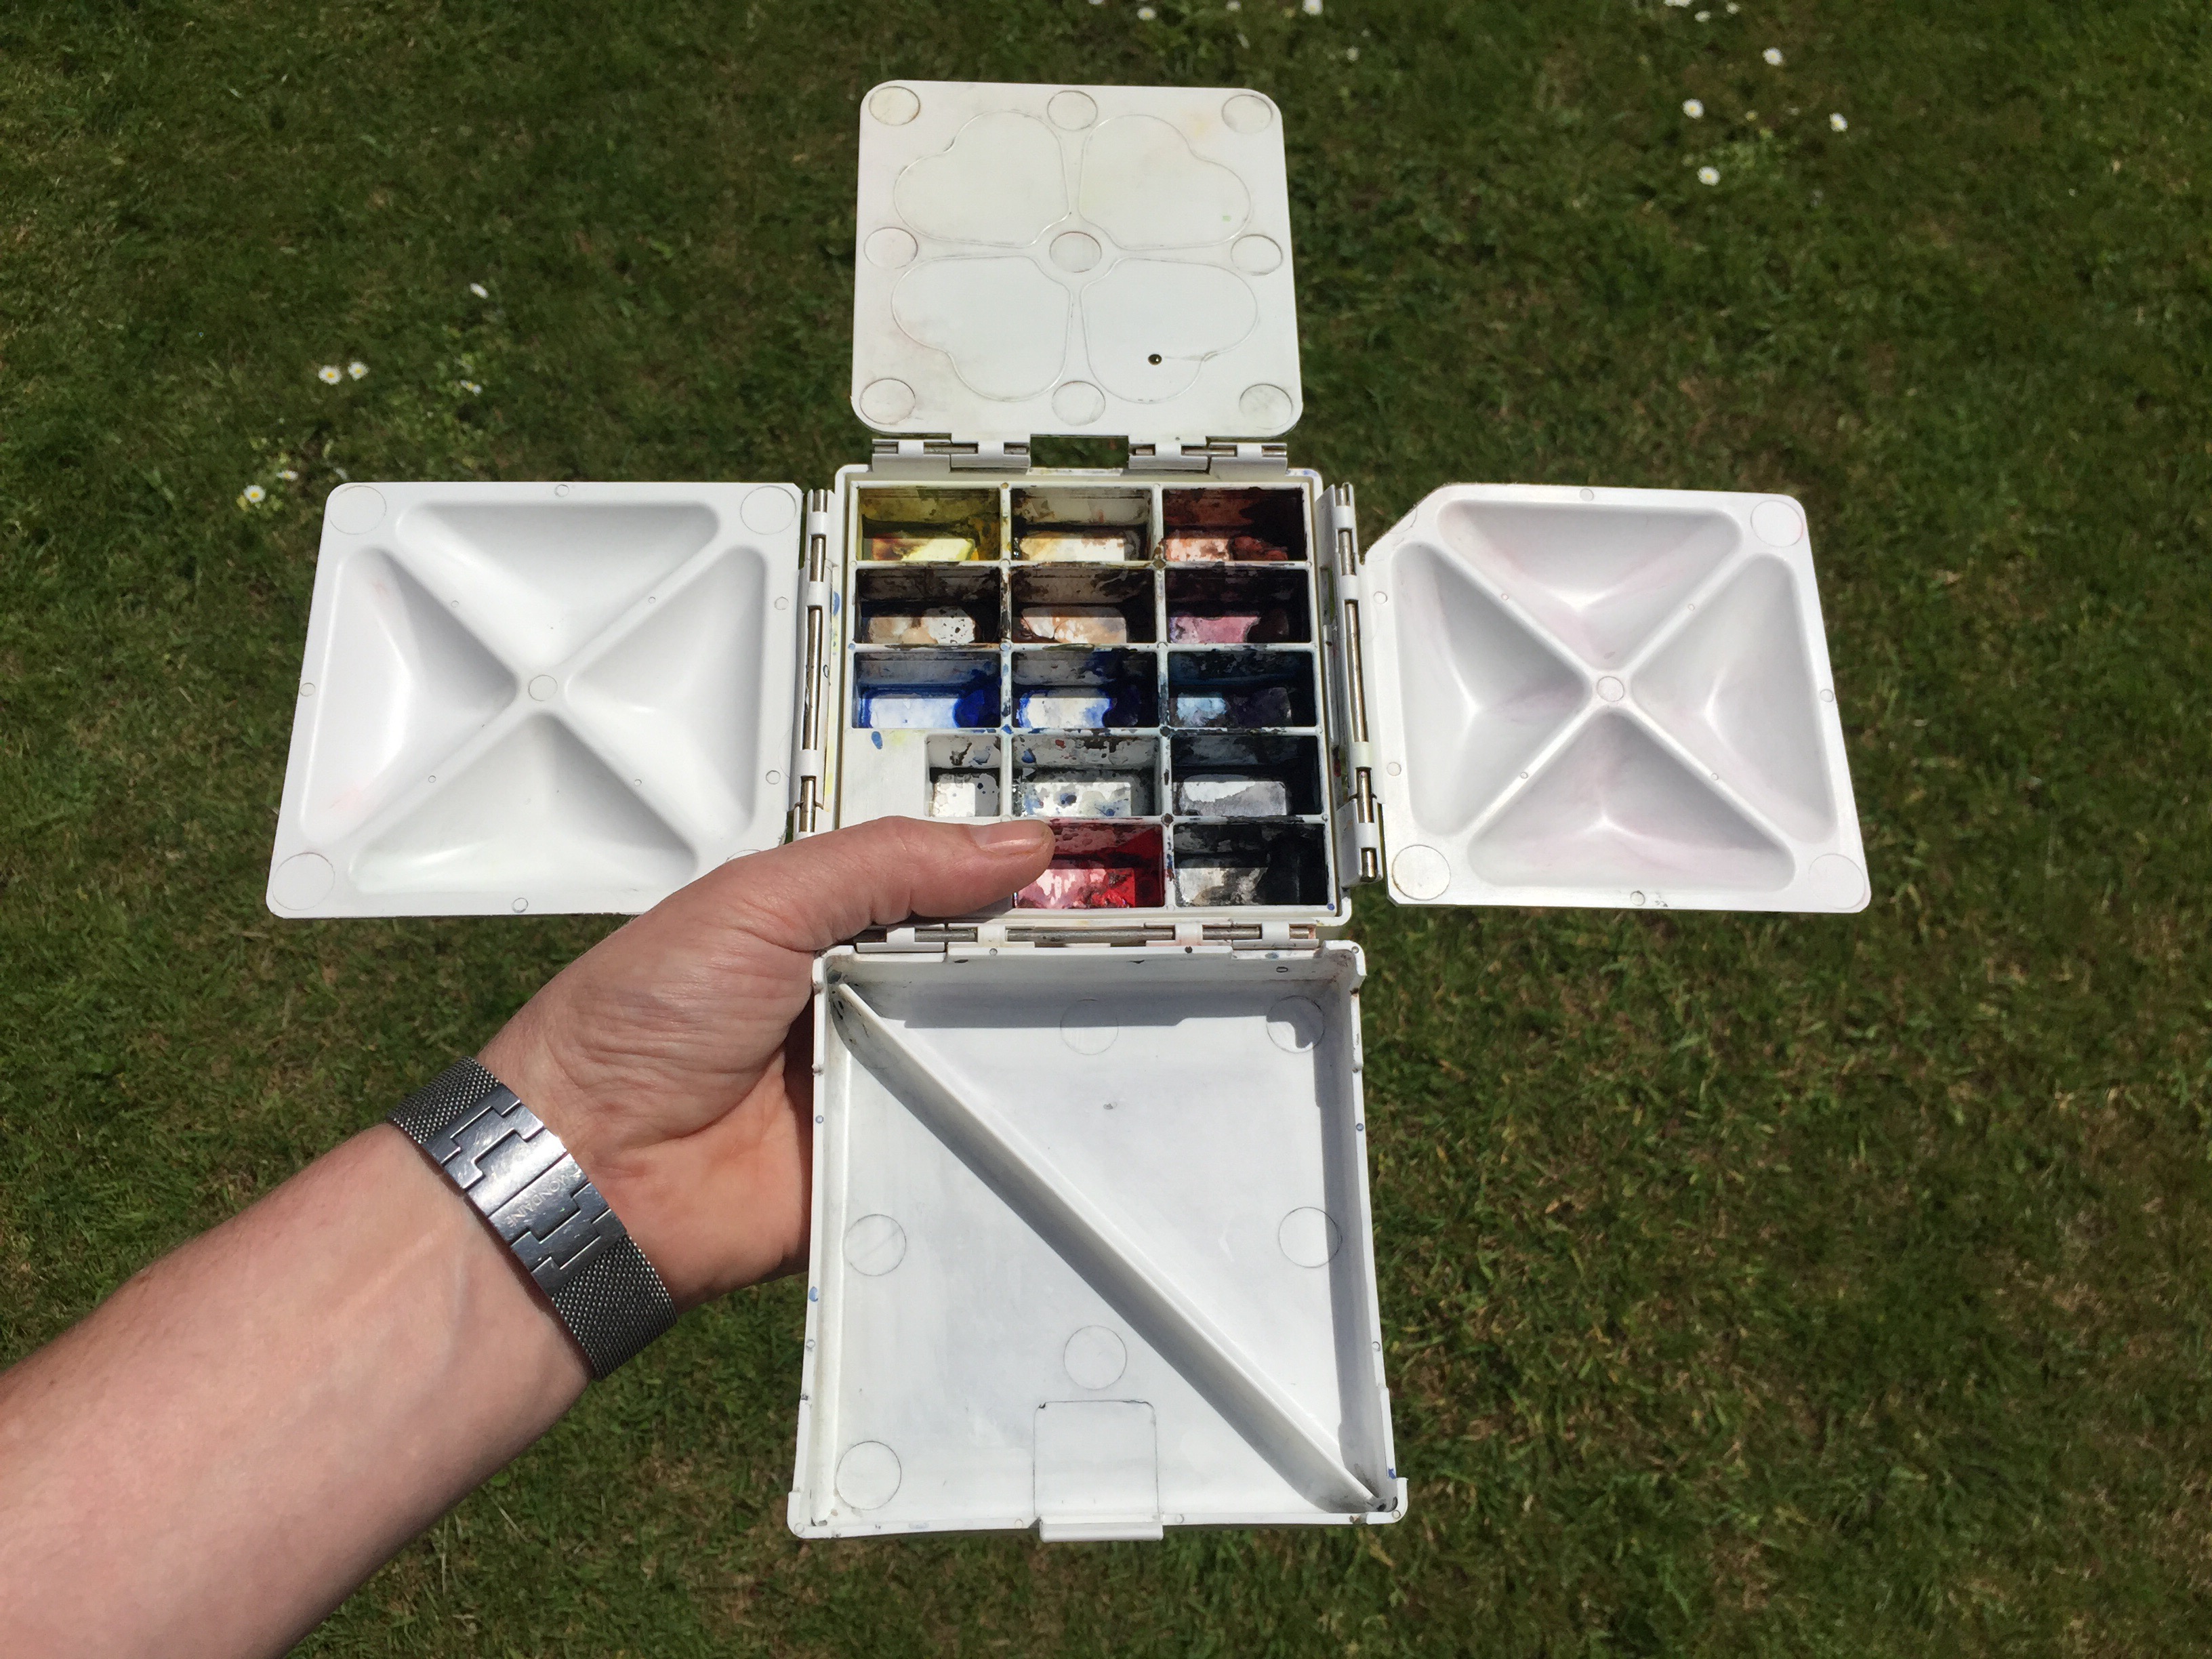
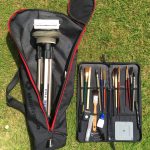
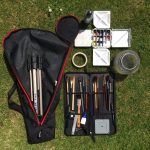
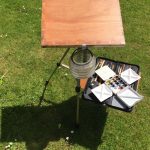
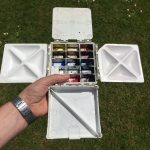
As I was photographing the board, and the sun was shining, it also seemed opportune to photograph the rest of my plein air kit:


Well – hope this hasn’t been too dull a post and I hope that this may inspire other similar DIY projects. If it does, please let me know, I’d love to see them. Similarly, if you have any suggestions for how this could be improved or modified, do let me know. As an irrepressible fidget, I doubt this will be the last one of these I make. If you have any queries about any of this kit and caboodle, just drop me a note in the comments section and I’ll do my best to answer any doubts or concerns.
So finally, a quick slide show to show how easy this all is to unpack and set up.
Look forward to being back with a painting or two next week all being well!
16 thoughts on “By popular demand…”
Pingback: A post about a page –
Pingback: First plein-air watercolour of 2018 –
These is extremely helpful, John. Thanks so much for sharing again! Absolutely not over-egging! :-)
Thanks so much Brushparkwatercolors that’s much appreciated- and thanks too for being one of the first visitors to my new ‘theme’! I’ve changed from ‘blask’ to ‘rebalance’ and am still getting used to it. What theme are you using? I just signed up to follow you and really like how your site’s presented!
Hi John, i think the theme I am using is called `Cubic`- it is pretty simplistic and this is why I caught my eye. But I do like the look of yours, too. :-)
Thanks! I really liked being confronted with a solid wall of images when I visited your site – its very powerful and confident!
Thank you John for this post because I was thinking just today while I was at the hardware store, that I need to see about getting my husband to make me a watercolor set-up. This will come in handy.
Thanks Margaret – Look forward to seeing what you get!
Wow! Cool! This is an awesome set up! Love seeing it all come together! Nice, John!
Thanks Charlie – hoping I’ll be able to put this kit through its paces in July as part of the World Watercolour Month!
Awesome!! Can’t wait to see what you’ll make with it! If you’re on Facebook be sure to join the World Watercolor Month group there!
Ah yes – I’m struggling a little with my Facebook presence! I’ll follow but it probably won’t show up as my Brusheswithwatercolour page! Finding Facebook far too complicated 😬
Honestly, I’m not very active on my personal page, but Facebook groups are cool in that people can post as they go in a more controlled setting and interact. So yeah, I think you do have to sign up as you and not your page.
Thanks Charlie – I’ll get onto it straight away!
That’s quite a set up!
Thanks – I think it’s still a work in progress that may get more refined as I do more painting outdoors.